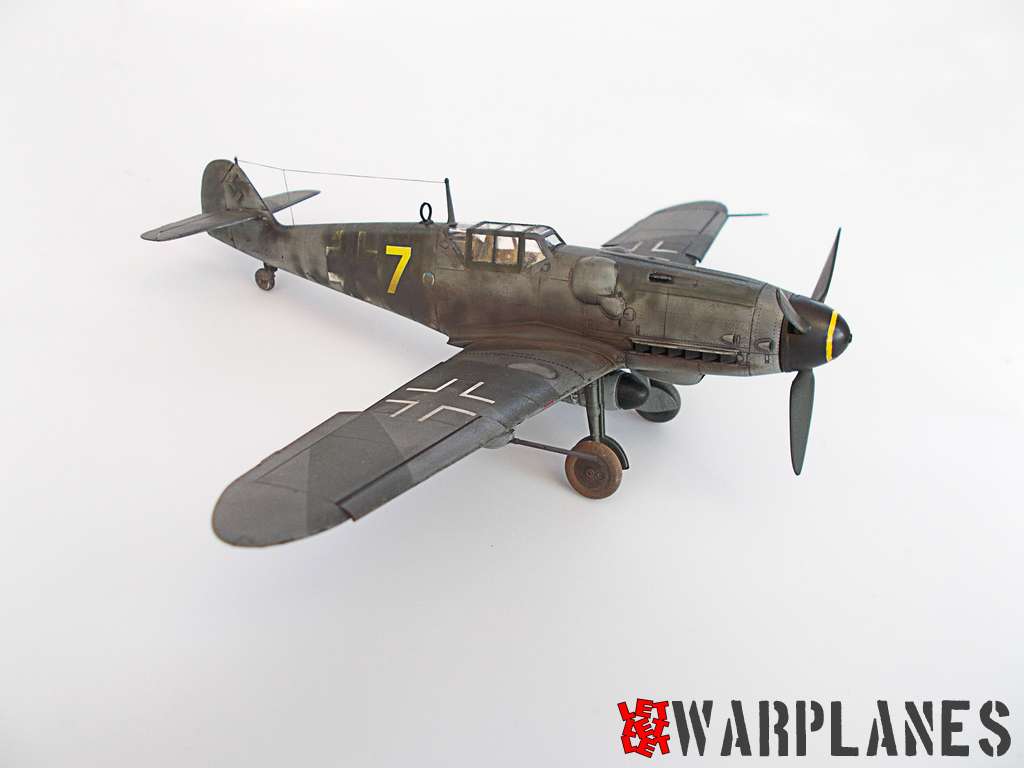
Bf 109G-6 yellow 7 JG300 1/48
Bf 109G-6 Kanonenvogel “yellow 7” of JG 300 is interesting machine and for a years back, its photo was able to see on Internet. Armed with extra pair of 20 mm cannons under wings, fuel tank, with painted over national insignia, look to me as attractive subject to try to make kit. On my side I have all I need, plastic kit, update sets and good will.
Basic kit present Eduard 1/48 Overstress Bf 109G-6, stock code 82113 and I also have remained parts in box from the previous Bf 109 kit I have built. Add to this, I have also selected few other products to be included in build. For built instructions I took one from weekend series Bf 109G-6 from Eduard.
Inside
I decide not to do any big enhancement of the interior, to built it from basic plastic parts and add belts. Belts used here are FE892 for the Tamiya kit but I find not any difference from those used in Eduard kit. At least, no matter on which kit is used, belts must look the same. This set is simplified in way that it have elements for one kit and this is perfectly enough for this build. Easy to handle and good to shape, they are from steel series of Eduard products. Total number of parts is six and in few minutes in total, seat can be equipped with.
External
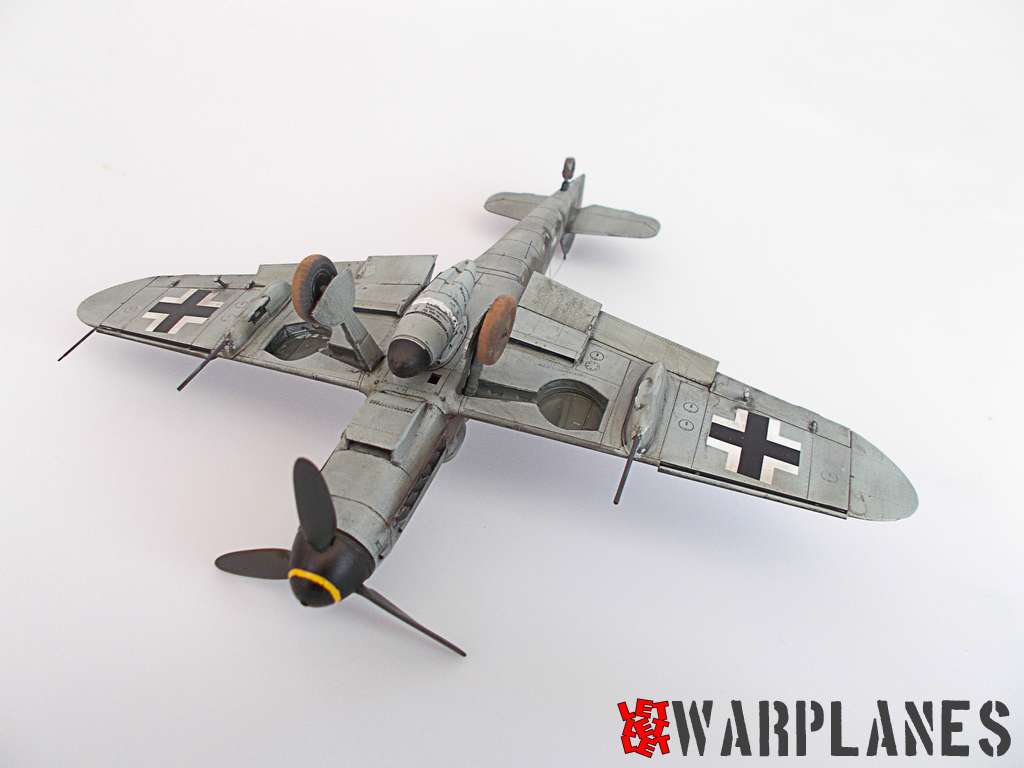
For upgrade kit externally, I used few of the Eduard products. First to mention here is cannon pack, Eduard stock number 648246. It is important to know that before wing parts assembly, there must be drill holes for external equipment, in this case for the gun packs and fuel tank. This points are clearly paced on the wing bottom part.
Eduard Bf 109 cannon pod provide material for two cannons, one under each wing and inside is provided resin parts as well etched parts. It is excellent for detailed upgrade as well it provide options to make it open where cannon installation visible inside is. I use it as closed, which is must say, not so attractive but hope in one of next build, I will make one open. Just three paint is need for this, one for structure interior, one for the metal parts and one external color, camouflage.


Another product to use externally is fuel tank and this is Eduard product with stock number 648265. Inside is in total four resin parts, two are pylons (identical) and two fuel tanks of different types, one of each. Also is provide small decal sheet with different colors of stencils. To regret, I experienced problems with this one as well decals stick to protective paper and top film was damaged. So I choose to use extra decals I have remained from several of previous builds I have done in past.
Camouflage and markings
Well, this is favorite subject for confrontation on various modeling sites, let me guess that this build will bring new fire (or maybe not). I say many time and many experts in the fields (not aviation enthusiast, I mean on real expert) sate the same- impossible from black and white photo to give info of real photo. All can be just guess and reconstruction can be done only if any additional info is available. Subject of this kit is real puzzle too. It was obviously belong to some unit before and its original unit number was painted over. Paint used for this cover up can be black, black green or who know which one else. I decide to use back green, RLM 70. Also evident that spinner is extra dark with thin line in front. This color differ a bit from color used to paint over the fuselage, so I decide to use semi gloss black. Line on it is so pale but not white, it can be yellow, light blue, pink… options are so many, and I select yellow.
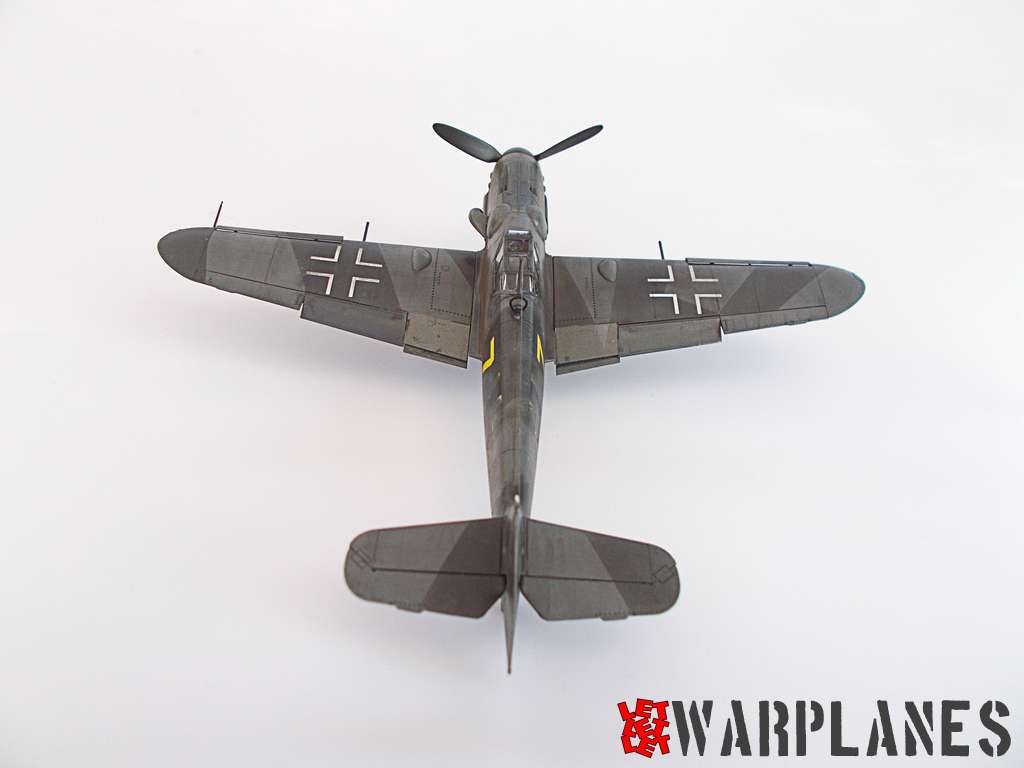
Basic camouflage is of RLM 74, 75 and 76 and for this purpose Eduard mask product EX511 is selected for masking. Use of this mask product was described before as well all of its benefits. As well basic kit have no decals, another Eduard products is selected for that purpose. Svastika is Eduard stock number D48028 and fuselage and wing crosses are D48027. There is provided few different types of markings, fine enough to fit many of possible build projects. What I did not have is number 7 in yellow color so I design it by my self and it was printed by APC decals.
Interesting to note that I have first apply basic decals on kit, then paint over area with RLM 70, this include also that national insignia was also toned down with camouflage color (one period practice in JG 300). When this coat was dry, I apply numbers 7 on fuselage.
Final touch
Kit would not have soul without some authentic worn out touch and for that purpose, I used Ultimate products from UK. On this build I use it in two way, first was to coat entire kit in layer of dark wash and then wash it out and in final work I dry brush it to product exhaust trace on fuselage. To do that, I pour brush in dark wash and left it to dry overnight. Next day it was ready and I smooth it over surface and it leave very nice traces.
And very last work was to put Bf 109G-6 gun barrels on the top of front fuselage. Eduard product is 648401 and it includes two barrels cast in resin. Work is simplest possible, paint it first, cut and place in its position.
My big thanks to all who support me in this build project, first at all to Eduard with a number of their product provided, Ultimate for excellent products for weathering, Lubos Vinar who has print decals and Jean Claude Mermet who assist me with historical info about the subject I build. Thank you all and hope we will see again in next project.
Srećko Bradić


Hello my friend !
What a good rendering ! Amazing.
You are so welcome and thank you for help 🙂