Tarangus Tunnan
The Tunnan was a very important aircraft after WW2 and one of the few modern jet fighters of the time. As a model kit, this type did not have much attention and it is great to hear that a manufacturer from Sweden decided to release this kit. The manufacturer is the well known Tarangus and this summer they released this brand new tooling kit of the SAAB Tunnan.
Kit is in 1/72 scale and the main feature is simplicity. In the kit you get two frets with grey plastic parts, one fret with transparent and a few of the resin parts (pilot seat, main landing gear box, sight and exhaust). All parts are precisely manufactured and panel lines are very fine and correctly done. The rest of the kit box content is the assembly leaflet and excellent printed decals.
Assembly is more than easy, parts match each other perfectly and very interesting that in general there is a lack of pins for positioning but this does not present any problem. I have just little remarks regarding some details I spot in the very start. First of all is the shape of the fuselage front, it is a bit off round shape, but this is not critical since the front ring is very precisely rounded and there will be need for a little filler to fill the very narrow area. I guess this problem is more a result of the shrinkage after part cooling, not a basic design failure. Other minor detail is the lack of one console inside the cockpit. It is very easy to scratch it from a piece of plastic.
Interior of the cockpit is mostly a green base. In the early stage of the build I did not put the seat inside but left it for final work. To place cockpit assembly inside fuselage, you need to remove and sand ejection pins located on the line of the cockpit floor. I have removed all major parts and make comparison with the resized blueprints of the Tunnan and noted that kit is very correct!!! Please note on the images of the cockpit- I have added some decals for cockpit and used Instruments from APC decals and Airscale decals.


You need to pay attention when placing the main landing gear box inside the fuselage. Make a few dry runs before final cementing it to align the holes for placing of main landing gear. If you miss the box position, this could affect the final position of landing gear. So take care on this step!
Assembly goes fast and easy, you can cement fuselage halves and after that add the already assembled wings and single part horizontal tail. Externally the Tunnan kit has just a couple of parts to be added, they are gun muzzles on the front, several various intakes and aerial mast on fuselage. It is good to seal all the joints with filler and when you get a smooth finish of all surfaces, spray coat of surface primer and make it ready for painting.
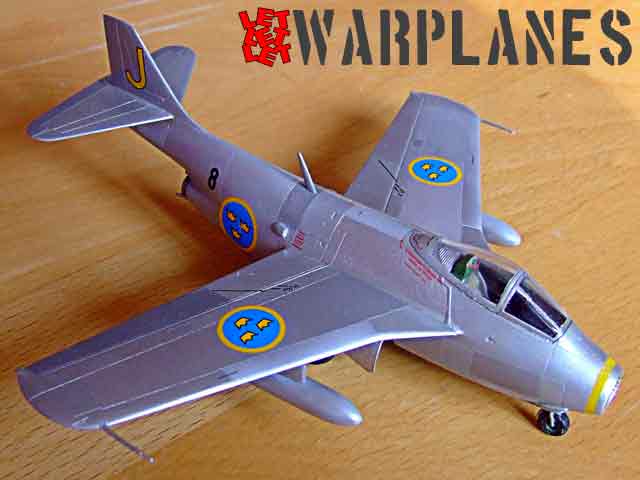
Painting instruction provides all Swedish models including those served within United Nations and all are natural metal finish. It is on you how you will get this finish; take a note on various panels it needs to show. Decals are excellent printing and they require not much time to place them all.
This Tarangus kit is an excellent one! Very precise and easy to do, I give top recommendation to this kit!
Great thanks to Tarangus who provided the sample product.
Srecko Bradic


