Jugs over Germany
It may sound strange but in my four decades of modeling life, I have never made any P-47s, in any scale. And I am very fortunate and happy that my first kit of this famous airplane was the one specially arranged by Eduard in 1/48 scale.
I say ‘specially arranged’ because this is basically an Academy kit and Eduard has enhanced it with new resin elements, photo etched parts, decals and quick masks. The kit I am talking about is their limited edition series, stock number 1179 and the scale is 1/48. The kit name is ‘Jug over Germany’ and it features excellent cover art as well box design. Inside are a few packs of resin parts, two sheets of etched parts (one pre-painted), two sheets of decals (one primarily of stencils and the main sheet with unit markings and national insignia), a quick mask set and of course- several plastic frets with basic plastic parts. No need to mention that inside is also excellent instruction booklet for assembly and finishing the kit.
I have no knowledge about the accuracy of the basic Academy kit. It is not an Eduard product, and I did not take any measurements or analyze it, but overall it look s fine. The instructions start with the cockpit interior and in this case all of the elements are Eduard resin, not one part from the basic kit is to be used. My standard start is to spray a coat of the primer onto and all over the parts, including those which will be used much later. This primer coat dries soon so I apply a coat of interior green over it. This green was a bit of a problem and many sources indicate that this green was darker than standard Interior Green we usually use. One of my friends, who would like to stay anonymous, had a chance to get info from a gentleman who worked for Republic on Thunderbolt production. Here in an extract of the info:
In the 1990s I conducted a snail mail correspondence with a Mr. Clark Hollis, who I lost contact with about ten years ago. He shared some Republic assembly plant information. An assembly line worker at one of the Republic plants had recorded the variants of USAAC olive drab applied to P-47 production and claimed there were at least 17 differing shades of it used on them, at the plant he worked in. The reasons had more to do with war time shortages of pigments the paint suppliers to the Republic assembly lines had to deal with. USAAC #42 Olive drab had a complicated formula of pigments, that when some were left out, led to the paint not holding true to the color standards they were mixed to. The main problem was the deletion of chromium pigments from the mix, due to chrome being declared a ‘strategic material’ resulting in its use in a paint being prohibited by authorities. Chromium pigments function as color fixers, helping to maintain color fastness. P-47 interior colors have not been reported to have varied as much as the exterior camo color, but the paints were mixed by the same manufacturers under the same restrictions on use of certain pigments.This info gave me a headache so I chose to select some additional info from preserved interior parts and used deep green for the interior, with hopes that I did not fail too much. Anyway- work on the interior assembly goes so smoothly, and no particular issues emerged there. The mating up of the parts is perfect and positioning of the etched parts on the interior elements goes fast. I must point out that when you completely assemble the cockpit interior you get a hub which match rails and hang points inside the fuselage parts. Use care, if you find you cannot place it properly inside the fuselage. If so, you should sand the bottom of the tub in order to place the tub precisely inside the fuselage.
Before cementing the fuselage sides together, you have to put in the cockpit tub as well as one small etched part located inside and at the bottom rear of the fuselage, the exhaust section. When the fuselage sides are glued together you need to place a small etched construction behind the pilot’s head. I am not satisfied with this solution as there are six small parts that need to be bent and placed on the side of the canopy’s sliding rail. This was not a problem for me but could be so, for less experienced modelers. To promote ease of assembly and simplicity, so work on the kit can proceed smoothly, so more modelers can make it successfully; maybe consideration should be given to this rail section being made from resin with only a single etched metal part at the top. Regardless of that, the end result is very realistic. The kit instructions suggest that in this step one is to place the gun sight at the top of the instrument panel. I decided instead to leave it off until later, to avoid breakage or loss and attach it later during the final pre painting assembly.


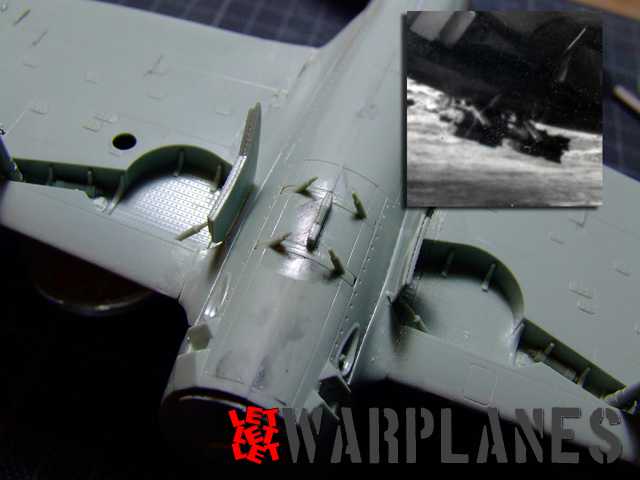
Work with the rest of the elements was easy, wings and stabilizers are fast to assembly as well elements of the landing gear. One important point is that you should trim the pins of the small main gear doors a bit, they are too long. From my point of view, there was no need for the wheels so I left this for the very end. Wings and stabilizers mated to the fuselage excellently and there is no real need for any filler use. So I focused on the final preparation before priming and painting the kit. So I finally put the gun sight inside, protect windshield and the canopy and cement the windshield onto the fuselage. I left for the very end of assembly the propeller (two sets are included, so you have to choose which one to use), the main wheels, gun barrels and metal covers for the tail wheel.
The kit provides options for the following versions to be built:
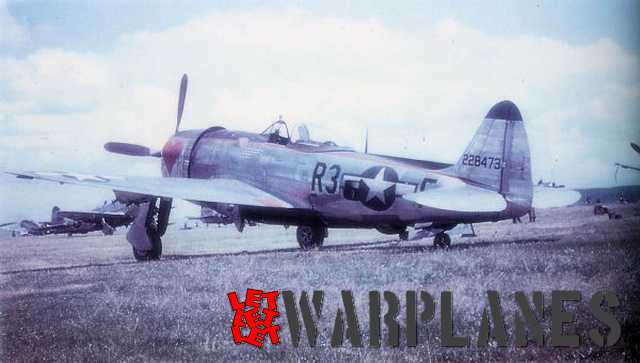
• P-47D-28-RA, flown by Lt. Talmadge Ambrose, 410th FS, 373rd FG, Venlo airfield, the Netherlands, March 1945
• P-47D-25-RE, flown by Capt. Fred J. Christensen, 62th FS, 56th FG, Boxted AB, summer, 1944
• P-47D-26-RA, flown by Maj. Donavon Smith, the CO of 61st FS, 56th FG, Boxted AB, early 1945
• P-47D-28-RA, flown by Capt. Robert Blackburn, 509th FS, 405th FG, Saint-Dizier airfield, France, 1944
• P-47D-28-RA, flown by Lt. Harold Cox, 512rd FS, 406th FG, Y-29 – Asch airfield, Belgium, February – April, 1945
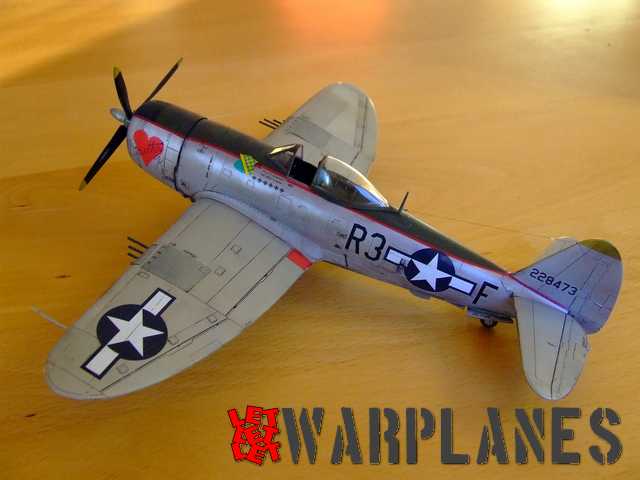
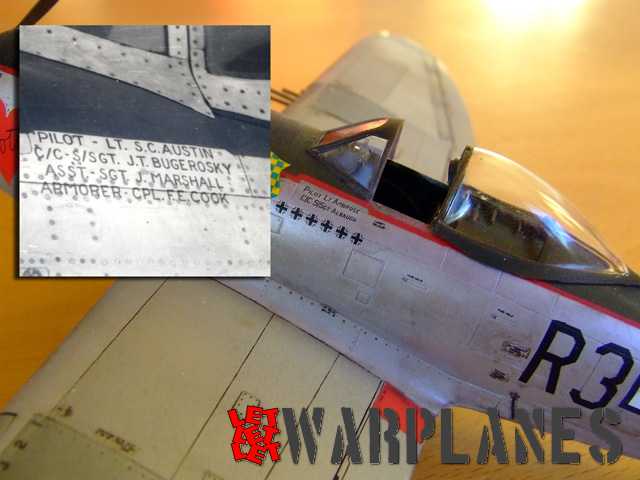
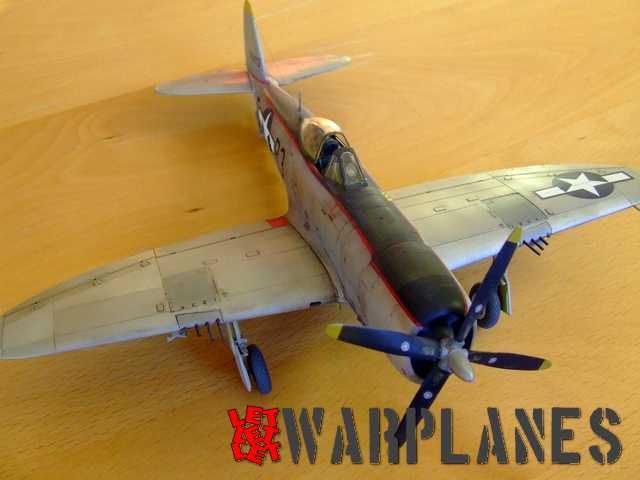
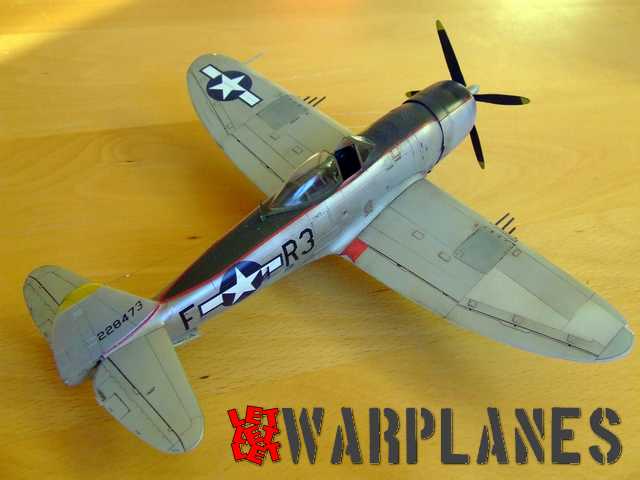
The one that caught my eye was the machine flown by Lt. Talmadge Ambrose. On one mission he shot down four Fw 190D. This markings option presented such interesting details that I wanted to have this one. This machine is illustrated on the box cover. The machine is all natural metal and I used basic aluminum paint with some additional painting over of various panels on it. There is not too much variation and most of the kit should have a uniform metal color. Note that some previous paint has been removed from the nose and in this area the metal is more polished. The top of the fuselage is Olive Drab with red trim, with a small part of the nose in black (the remains from a previous marking).
Application of the decals took just a few hours. I did it at night with a glass of juice and music from a radio. Colors on decals are perfect match and they slide so easy from paper to surface. As well many panels are under decals, I use decal softener to full contour placement on surface.
Work on the final elements of assembly took some hours. I then applied a clear flat spray all over the kit. Final work was stretching the radio wire. My experience with this kit was great! I made it in five days, working each day for no more than three hours. The assembly work was so smooth and all parts mated up perfectly. Most interesting is that on the back of the instructional leaflet is provided notice of an aftermarket product that can be used on this kit to make it even better and more detailed. This kit is very good and I recommend it warmly! You may have your sample here!
Great thanks to Eduard for the review sample of this nice kit and special thanks to Jack Cook and Ken Glass for their help with locating archive images.
Srecko Bradic


Great arctical, enjoyed reading it.