New Bf 109G from Eduard
Two years ago, I made a build review of Eduard’s brand new kit of the Messerschmitt Bf 109G in 1/48 scale and the review was not so fortunate. The kit was nice to build, crisp details but to regret, not correct in dimensions. The Eduard team showed they are serious in the model kit manufacturing business and just a few months ago they delivered a brand new kit of the Bf 109G, an entirely new tool.
no images were found
This new kit is impressive from the very start- first of all the cover art is done by Shigeo Koike, without doubt the world’s leading aviation art painter. About its classic paintings can be made even book, all I can say is that I am impressed to see classic art back on Eduard box. The kit presented here has stock code 82111 and it is released as a Profi Pack. The kit is Bf 109G-6, late series. I’ve already said that the box art is impressive, lets get inside the box. The assembly booklet is great and informative as well as easy to follow. Decals are provided as two separate sheets, one for the unit markings and national insignia and the other one for the service stencils. Excellent work and you can do following sample machines:
- Bf 109G, W.Nr.160303, flown by Hptm. Friedrich Eberle, the CO of III./JG 1, Volkel, November, 1943
- Bf 109G, W.Nr. 15729, flown by Obstlt. Hermann Graf, Stab./JG11, Jever, early 1944
- Bf 109G, W.Nr. 411960, flown by Hptm. Franz Dörr, the CO of III./JG 5, Gossen, Norway, May, 1945
- Bf 109G flown by Oblt. Kurt Gabler, 8./JG 300, Jüterbog – Waldlager Air Base, Germany, July, 1944
- Bf 109G, W.Nr. 165350, flown by Lt. Anton Hafner, the CO of 8./JG 51, Tilsit-Ost, August, 1944
Markings also accompanied elements variations are so attractive that it was not an easy task to choose which sample to do.
There are four frets in grey plastic with kit parts and inside are included many optional parts. This means that you can do many versions and sub versions from basic set with ease. One transparent fret is also very impressive and it contains three type of windshields, five type of cockpit canopy and two type of head protection plate. As excellent enhancement to these parts is the photo etched set which includes pre painted elements and they definitely give life to the cockpit as well to some external elements, like coolers. And last in the list of the content is small but important protective mask.
Build of this kit starts with the cockpit and I first assembled the floor with its elements- side wheel, etched metal foot controls, pilot stick and cannon cover. After that I sprayed these parts, as well as others, in RLM 66 Schwarzgrau. Before I started painting, I prepared all interior elements that need this paint, including rear protective glass. While these parts were drying, I prepared the instrument panel, pilot seat belts and fuel pipe. Instrument panels as well as the seat belts are made from painted etched parts and work is very easy. The drop-tank fuel pipe is from transparent plastic and it is fragile thin part so care must be taken during the handling. Middle section of this part need to be left unpainted, most of the body is yellow and small parts near transparent part is black. I used a hand brush to complete this task. Assembly of the cockpit interior includes placing of a few elements on fuselage sides as well as on the floor and fuselage sides can be closed.
Before the fuselage halves are joined together, there is need to place the exhausts inside and I have used the Brassin product. There are no problems with original parts but if you hunt for some extra details, then use Brassin material. The fuselage gives absolutely no problem during fuselage half join, it is so precise. Just in case I held the parts with tape until the adhesive hardened. The forward fuselage top is not molded to the fuselage sides and this is done with a reason. There are several options of the top engine cover and Eduard provides these elements separately. This gives great possibility in variants that may be built. Parts lay perfectly on front fuselage, no need for filler at all. Interesting that there is a small gap in the middle of the cowling and the cowling hinge is inserted there, made of injected plastic. Eduard gives great attention to every detail and the result is really authentic. Also side ’beule’ are also given as separate parts.


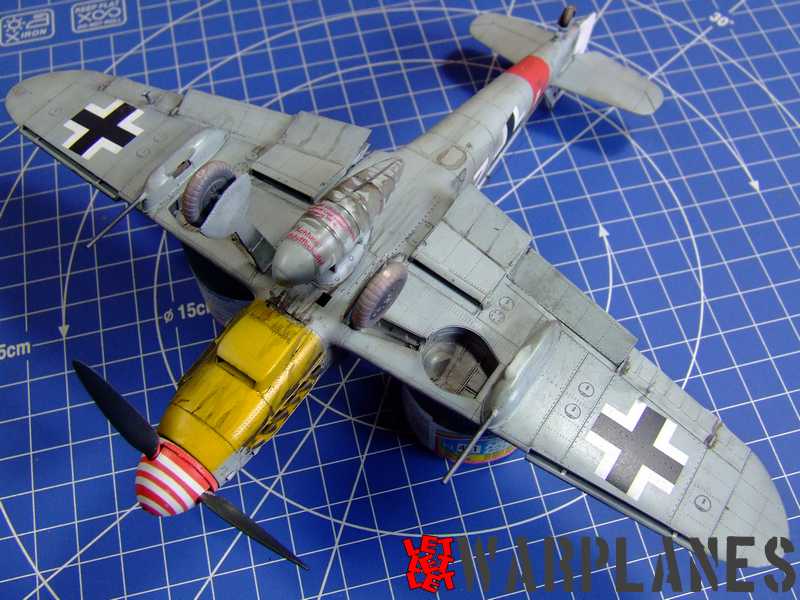
Tail elements are given also as sets of separate elements. First of all, there are two options for vertical tail, shorter and taller and both are given as vertical tail and vertical rudder. The horizontal tail is provided in a similar way, with separate elevators. Wings consist from bottom part and two top surfaces. Before they are glued in place you need to assemble the landing gear box side walls, they are made from three parts each. It looks a bit complicated at first, but it is not. When wing is assembled, it is to be placed on the fuselage, at bottom. It matches perfectly in place. Next stage of assembly is placing of radiator elements. Putting on the nose is easy, first two etcehd parts need to be placed on bottom plastic part of cooler, then this elements goes under lower side of nose cooler nd then under the nose. A little more work needed for the radiators under the wings. First of all, they have front and rear plates inside with etched mesh on it. This section is covered with a cooler cover. On the rear side goes flaps, top flap and bottom flaps. Take care since these parts need to be adjusted at specific angle. The rest of work on the wings is placing of control surfaces, flaps and slats.
So wings and tail completed, all main elements are on fuselage and next to do is the landing gear. I placed the landing gear legs with door on kit but it is not vital to do that Many modelers more prefer to finish it separately and they just to attach it in final steps of assembly. It is on you of course. I follow basic instruction and as I say, placed the landing gear. Step after is to spray a coat of RLM 02 Grau paint over it. It is easy to protect it from later camouflage painting and this is reason why I goes on landing gear work. What I did not do is placing of wheels. They are done separately and attach at the very end. In this case I did not use original plastic parts from box, which are excellent, but Brassin wheel set, which is additionally detailed. Last steps, before painting was to add protective plate under the cockpit canopy, a few small parts in the windshield, place mask over it and go to paint!
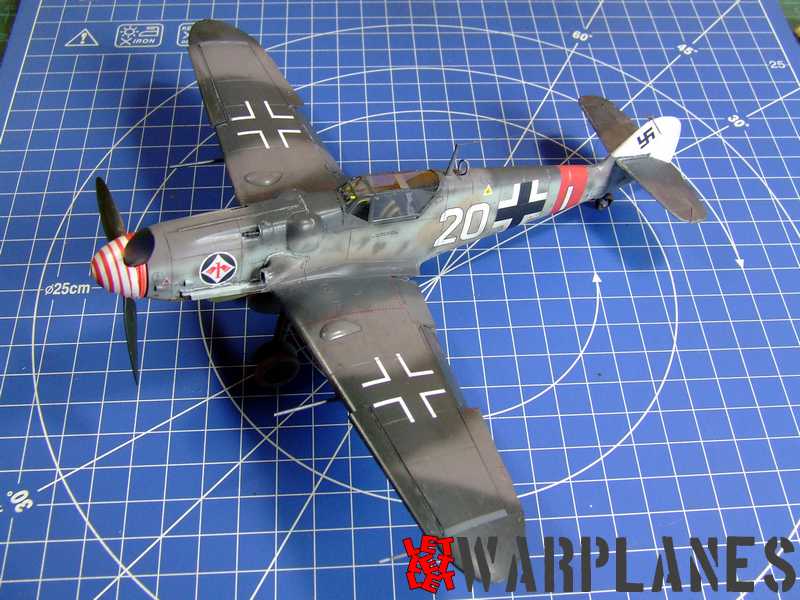
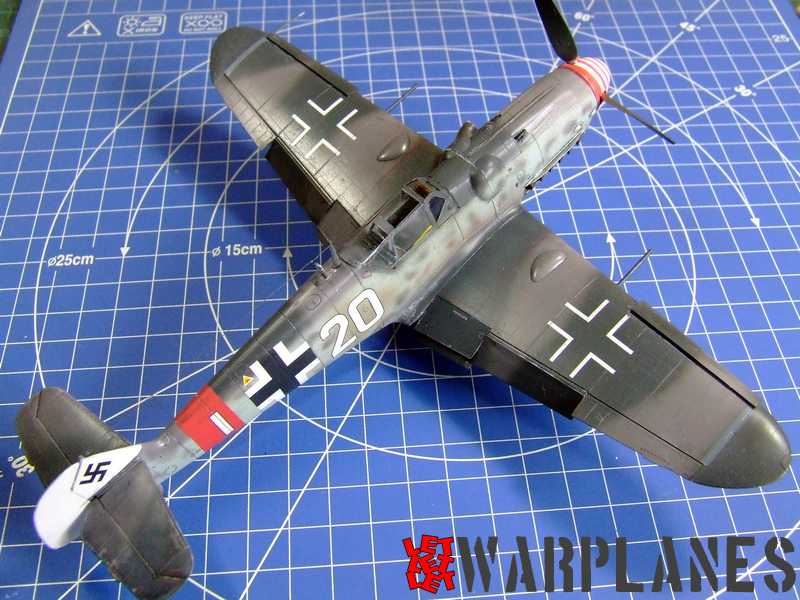
The sample machine I decided to do is machine Bf 109G, W.Nr.160303, flown by Hptm. Friedrich Eberle. I have decide from very start to make this kit, this is important since many details differ in build as well camouflage. Entire vertical tail of this sample machine was white and I completed it separately and after that cemented it in place. It set perfectly, I am very pleased with the result. Only problem is that I have already painted kit and placed all decals, when I have get archive images of this machine and they show more dense mottles then present in painting instruction. All marking details were correct.
no images were found
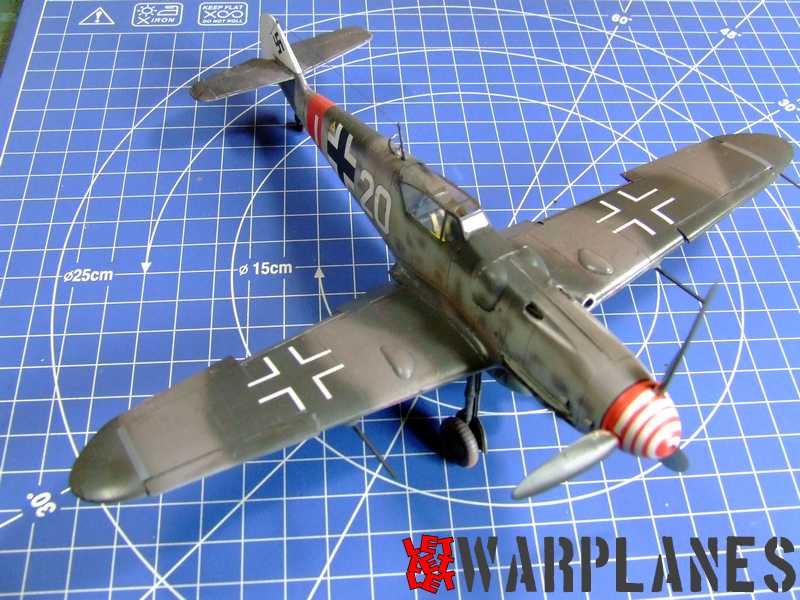
After the entire kit was finished, including wash over it and stain added, I have used the Brassin propeller. With this product I have also test protective mask for spirals. Very last step is adding of the Brassin wheels.
I had an excellent experience with this kit and I will give a high recommendation!!! Perfect work, excellent details, many options! Note that Eduard released also Overtrees samples, which is pure plastic parts, much cheaper and you can use many decals you have in your stock to make it in many variations you would like to have. This kit you can have here and Overtrees here! But don’t forget other products related to this kit- Exhaust stacks (648 247), cannon pods (648 246), propeller (648 255), spirals mask (EX512), wheels (648 261), WGr. 21 (648 245), seatbelts fabric (49093), Bf 109G-6 engine and fuselage guns (648250), Bf 109G-6 cockpit (648240), Mtt camouflage pattern (EX509), WNF camouflage pattern (EX511), Erla camouflage pattern (EX510).
Great thanks to Eduard for sample products and… how about 1/72 scale version one day?
Srecko Bradic


eduard’s decision is commendable indeed. otoh they did drop the ball on a couple of other kits of their own as well, yet i guess this subject in particular being so popular, it might have forced their hand.
as for the 1/72 revolution of theirs, i’m sure it’ll come to that eventually since 190 and spit is out of the way now.
as for your build, great job. those gondolas are giving the bird a unique look imho. cheers.
Thank you for comment and I also hope expanding of their 1/72 range