Eduard’s Lightnings
Lightning lovers have great pleasure in the last couple of months. Eduard has delivered onto the market a few new issues of plastic kits and also some update sets for the P-38. There are a total of three kits; all delivered in the Limited Edition series. All three releases are based on the Academy 1/48 kit.
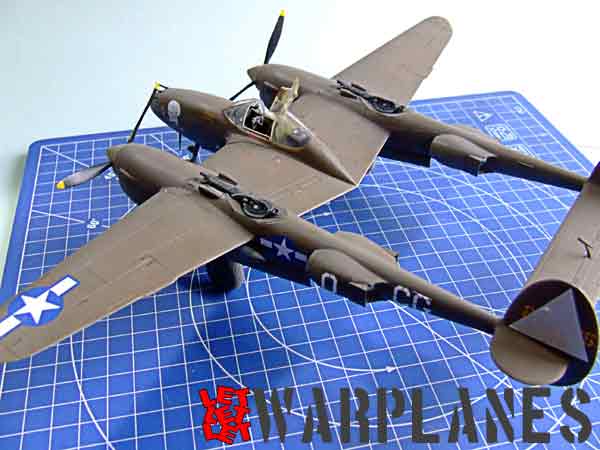
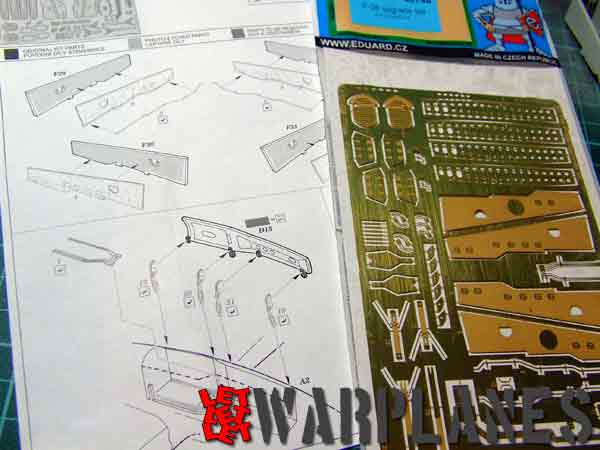
The kit we’re focusing on here is stock number 1170, named “P-38J over Europe.” The box design is excellent with nice cover art and the content is very rich also! The basic set consists of seven grey and one transparent plastic frets and the tires are presented in rubber. Then we come to the Eduard products. First off are a large number of resin parts, cast in excellent detail and top quality. These parts bring ultimate quality to the kit. Next up are the two sheets of photoetched parts, one with painted elements and the other (mostly with parts for the exterior) unpainted. Another standard feature is the quick mask sheet, perfectly shaped and cut, and no problem to lift from their base paper. The decals are printed on a large sheet and in the top possible quality. The instruction booklet is well made, easy to follow and with instructions to finish six different machines.
The interior is great on this model thanks to the fact that most of the original kit elements are replaced by Eduard resin and photoetched parts. No matter the complex shape and large number, assembly of the cockpit is easy to do and takes just a day or two to construct. Everything nests in place perfectly and matches in authenticity archive images of the real machine. During construction I have changed some steps. The original instructions direct that the cockpit section should be mounted to the fuselage/wing top section but I found that It is easier to place it dry in the bottom section and then install the top section (plastic parts A1 and A2). When precisely positioned in place, just pour superglue from the front side and fix the resin cockpit to the bottom plastic part. Then the rest is easy—use your regular model glue on the plastic parts and merge upper and lower wing together with the cockpit assembly in between.
Some difficulties occurred during assembly of the landing gear wells into the nacelle booms. Simple to say, these parts demand some force and clamps to keep everything in order. Beyond the plastic assembly, Eduard has provided very good etched parts for these sections and they bring much life to the kit. What I especially like are the hinges for the landing gear doors. They are easy to place on the doors but you will need much care during final assembly to give them strength at the bonding area. I did not use parts F 17 (two of these) at this time. Some images show that these are yellow, much different than the color of the interior. I painted these two parts separately and installed them at the very end of kit final assembly. Other parts I finished and installed at the end were the Eduard resin wheels. I’m sure you will agree that it is far better to complete them separately and add them at the end of the build.
Take care when mounting the nose elements on the kit. These need some care to achieve a good fit. Also take care to put enough weight in the nose—there is ample space in the nose to do this.
As I said, some parts are better to be placed at the very end, after the entire kit is painted and varnished. To the previous mentioned parts I would also like to recommend installing the machine gun parts (A20, A21, A22, A23 and A24), resin turbochargers R9 (two parts) and the entire propeller assemblies. Proposed paint schemes for the kit are beautiful and there are machines in natural metal and camouflage. My choice was the camouflaged aircraft whose pilot achieved several air-to-air kills in this machine.


Further Update
Soon after Eduard released this kit on the market, they delivered an excellent photoetch set for additional upgrading of the Lightning plastic kit. This set has stock number 48748 and inside is one large etched set with a number of exterior parts. The landing gear receives the most prominent update with this set. I like very much the new etched covers and interior structure of the landing gear doors as well as interior parts for the sidewalls.
More Lightnings
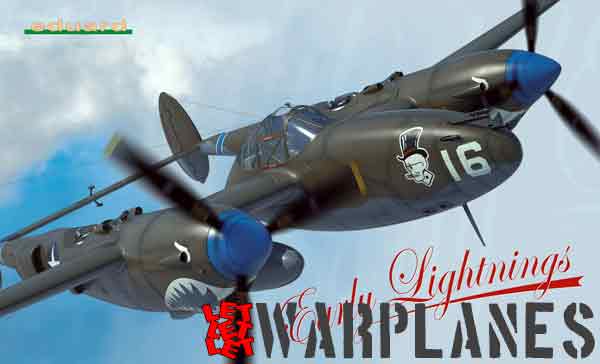
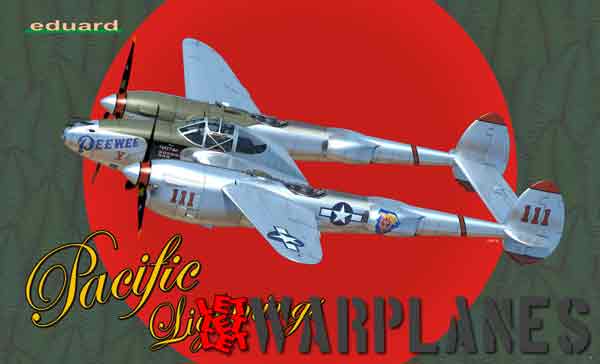
Fortunately kit 1170 is not the only new one released by Eduard. They already have introduced an Early Lightnings kit and have just released Pacific Lightnings. These kits are also based on the Academy 1/48 products and also provide full quality materials in the same fashion as the kit whose images you see here.
Final words…..
I have no idea how good the choice of the Academy kit is as a basic starting point for their products, but with the power of Eduard parts these become the most valuable and detailed P-38 kits on the market. I am afraid that I cannot recommend this kit to novice modelers but in the hands of an experienced modeler this product can be built without problem into a prize-winning model. The final appearance is so impressive and it is really worth purchasing. Here is how to get them:
P-38J over Europe / P-38 Early / P-38 Pacific Lightnings / P-38 upgrade set
Special thanks to Eduard for providing the sample products built and presented in this review!
Srecko Bradic


