Eduard Hellcat 1/72
Eduard Hellcat 1/72
[dropcap]L[/dropcap]ast period most of the Eduard releases present kit in 1/48 scale and they make nice return on 1/72 world with nice kit of Grumman Hellcat. The same kit were released in August 2011 and very first pack was done as Profi Pack and this product stock number is 7076. Box have very attractive combat art and it is interesting that it have no top cover but it is open on side. Inside were packed three frets of injected plastic, one of those in transparent, two sheet of etched parts (one with printed paint), one protective mask sheet, small but very detailed instructions and perfectly printed decal sheet.
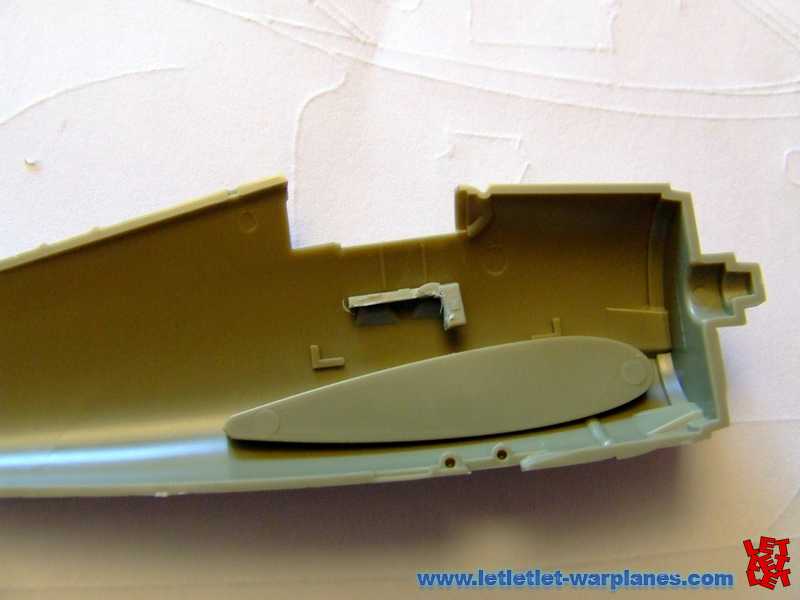
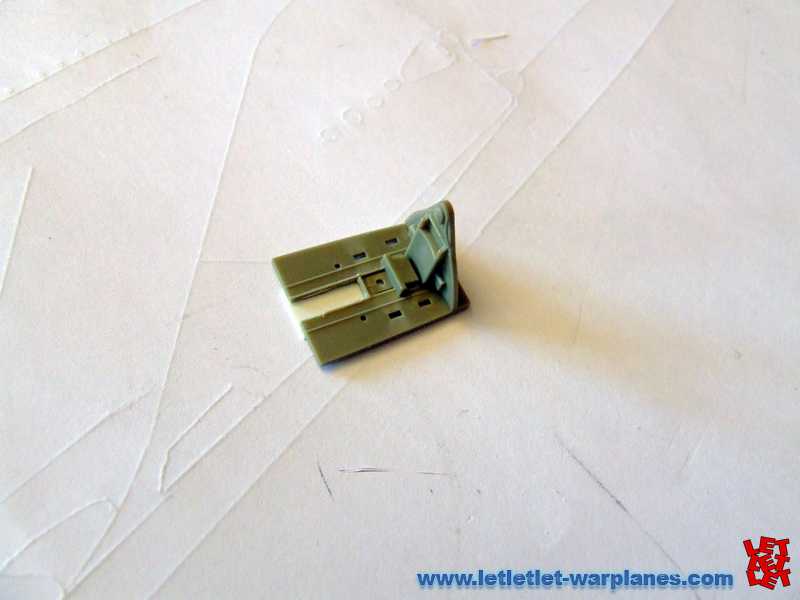
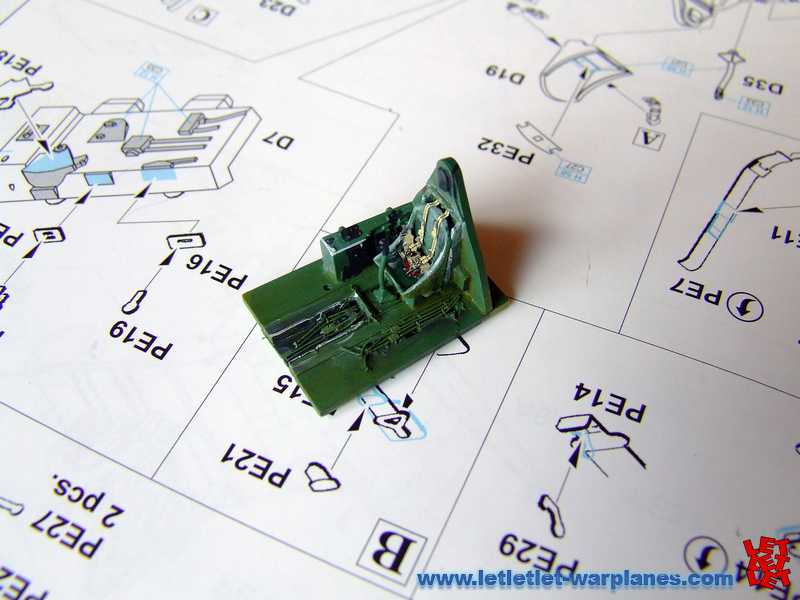
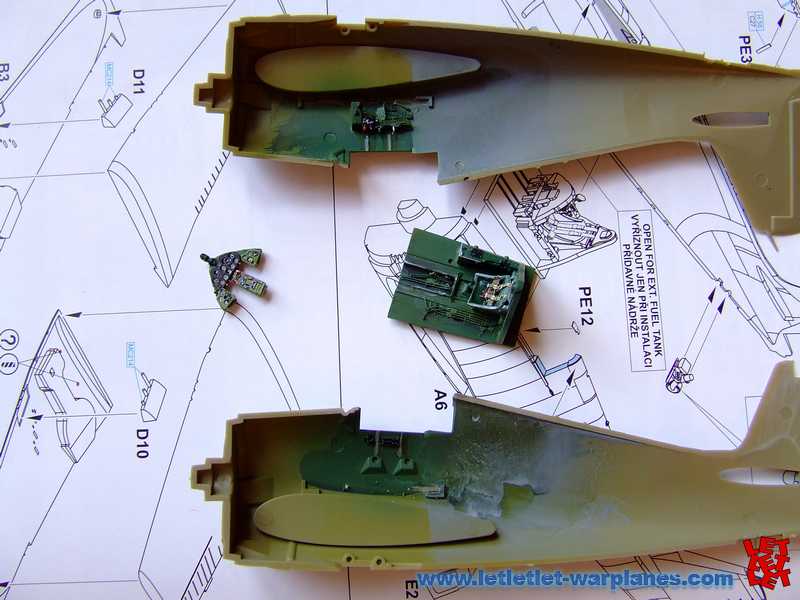
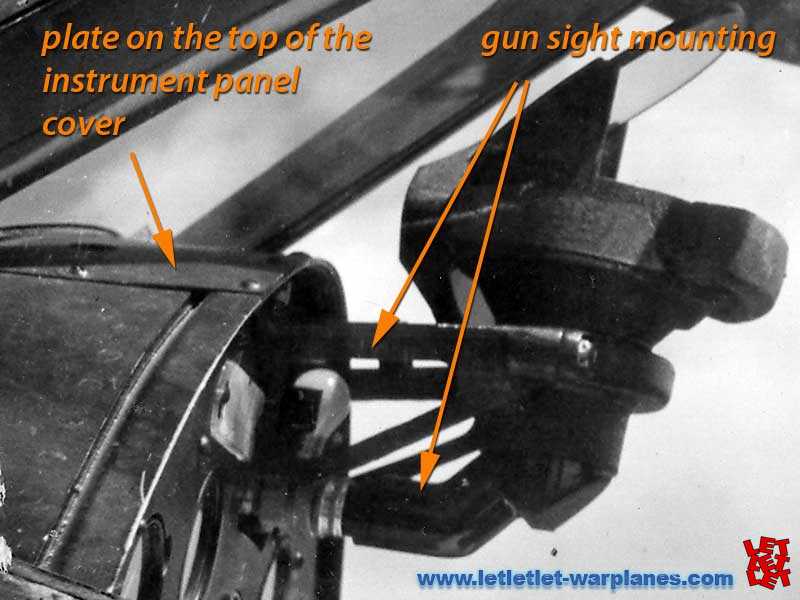
Arrive of this kit make nice chance to make some in detail analyze with the images of the real subject so whole of this build was made with close up following of the available archive material. First thing what is was on work order is the cockpit. Main elements of the cockpit were floor, seat, rear bulkhead, two side consoles, instrument panel, pilot stick and directional controls. First thing I noted is the flat floor and it have some like duct mid section. In order to make it more realistic I have cut off this mid section and cement on bottom plastic sheet. In the gap I have add all known wires and pipes I was able to see. Similar problem I have noted with consoles as well on port side it was only top panel while the bottom is open with much of pipelines and cables visible. This was adopted with removing much of plastic from part D7 and converting into proper look. Off course, all of this was refer to F6F-3 model.
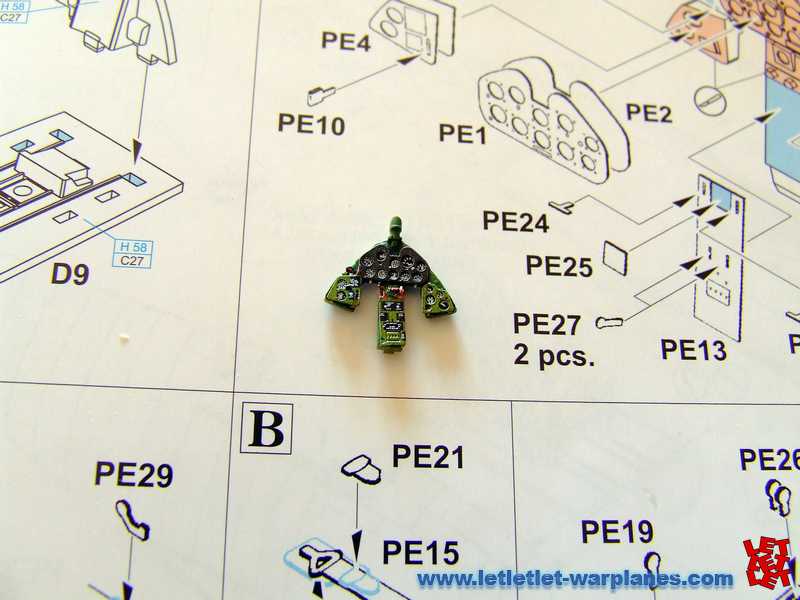
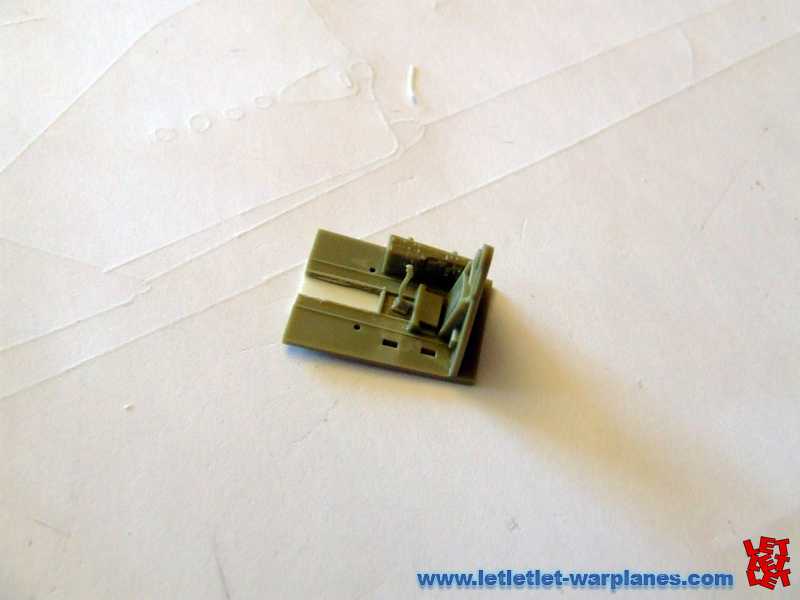
All interior was in the Interior Green color but as well early model have grey rear section, I have spray this in grey. Consoles have black instruments and when all of this is painted parts need to be enhanced with excellent etched parts. Etched parts cover instruments panel, pilot seat belts and many of the control sticks inside. As well many parts are so small, you need much care in handling.


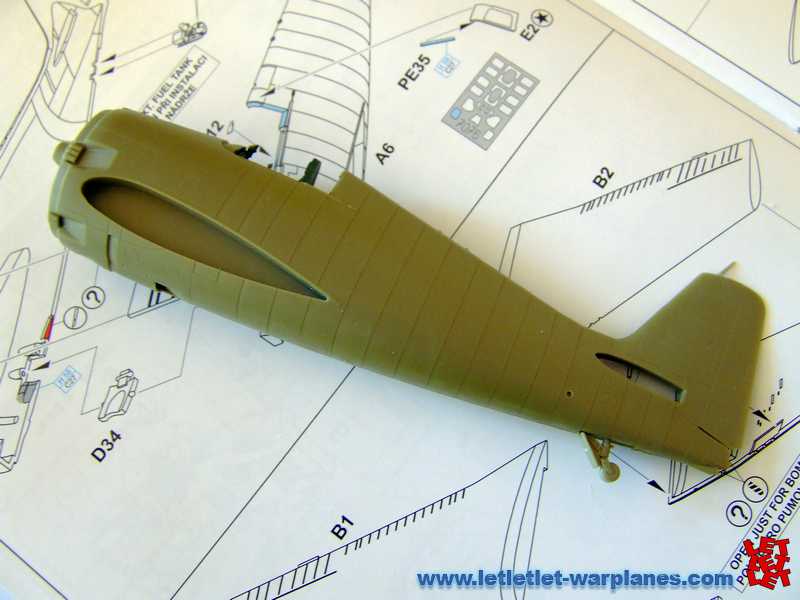


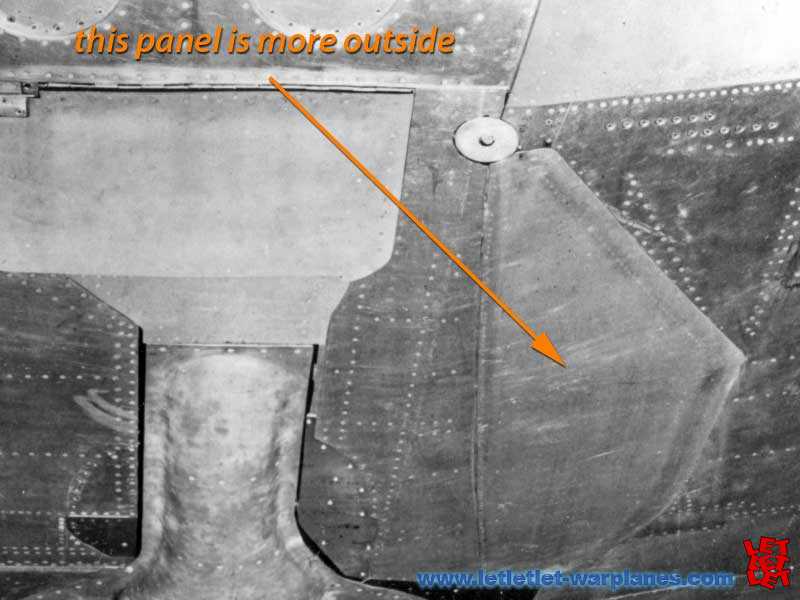
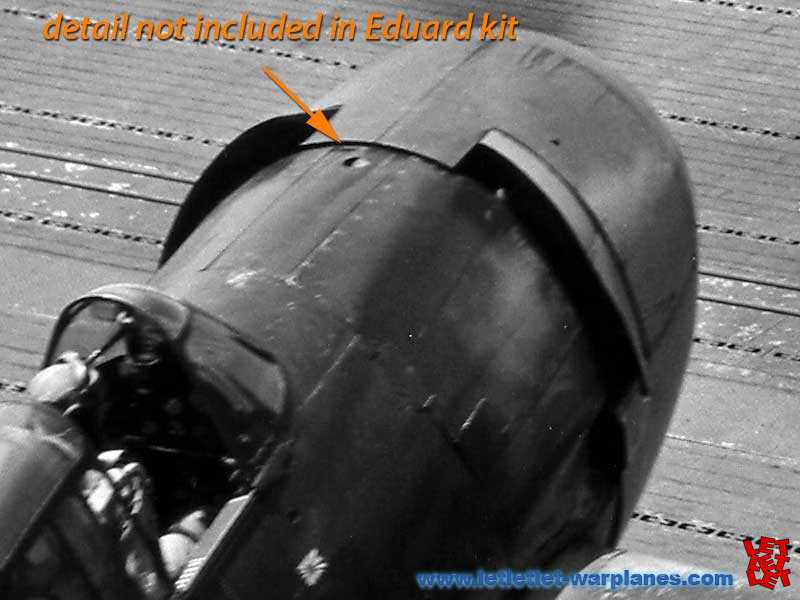
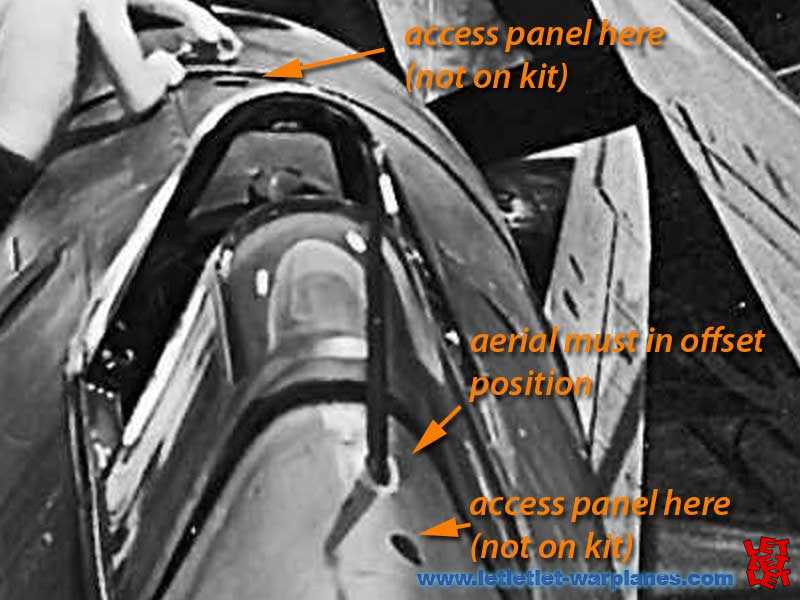
Merging of fuselage sides with interior is absolutely smooth with no gap or any fit issues. Simply perfect! One thing I do not like and think that Eduard did not solve this in proper way is the fuselage top, just behind the cockpit. First to note that Eduard kit cover all major production samples except the first one, which have some details different. One of features which make difference among the major series of F6F-3 and F6F-5 is the small windows on fuselage side just behind canopy. F6F-3 did have it but F6F-5 in general did not. Eduard solve this with placing two sets of parts, both sets are mold in clear plastic so choice is the with windows or not. Problem is the possible fit as well it is not sure that many modelers would be able to make stepped join of this section and therefore much of the originality could be lost. My opinion is that there could be better if they could make full plastic fuselage with just open places for windows, which could be with easy filed and sanded if modelers work later version. Solution is only to make absolute care in work on this part and use some very liquid cement to fix it in place, otherwise, the use of standard glue could result in glue leak on join line and this could require additional work to solve this.
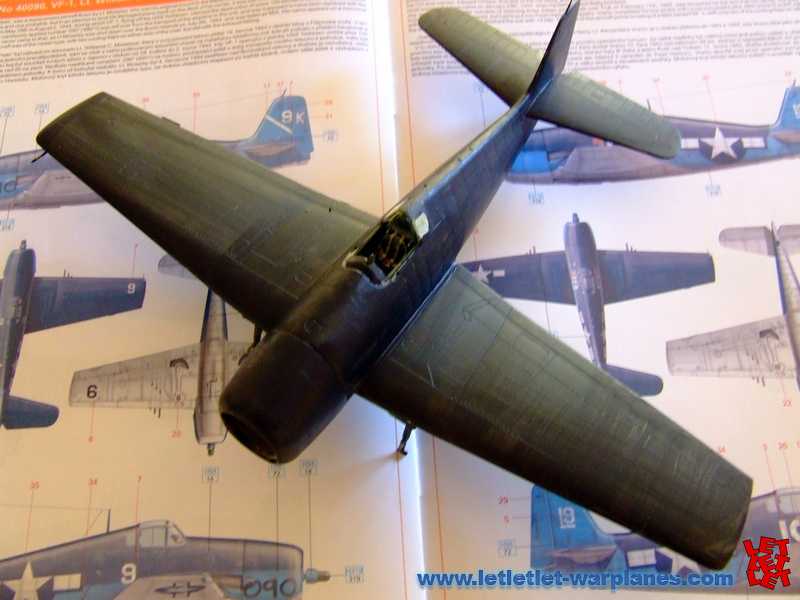
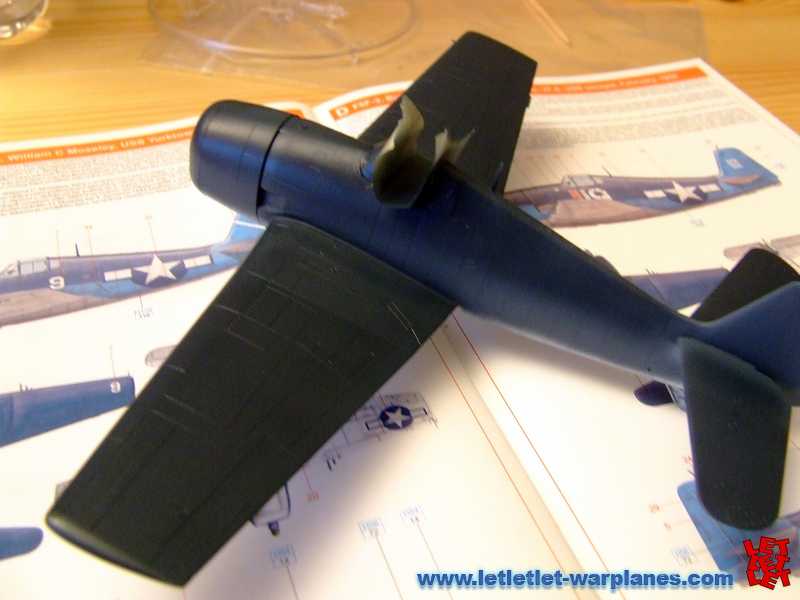
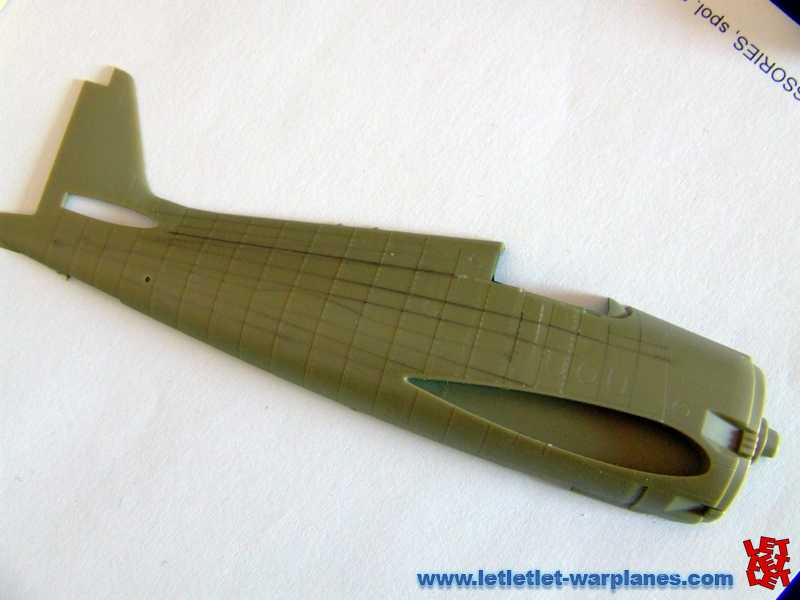
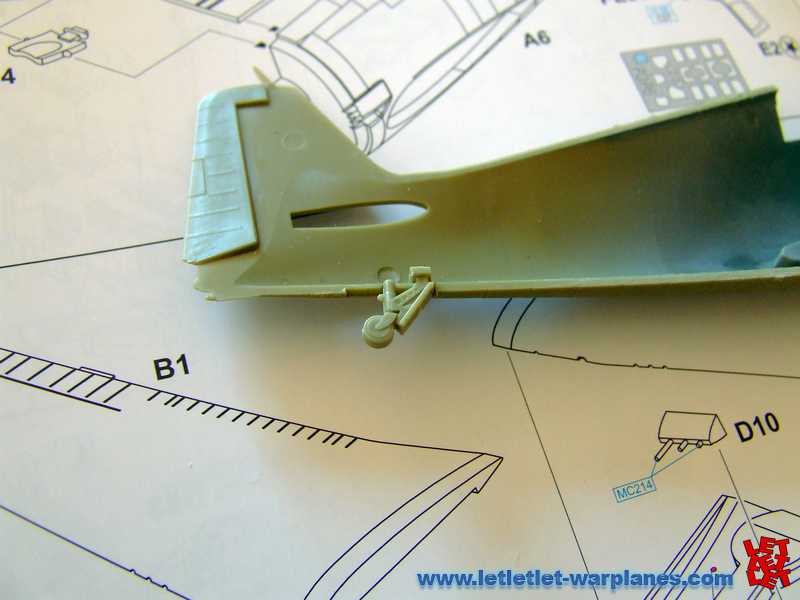
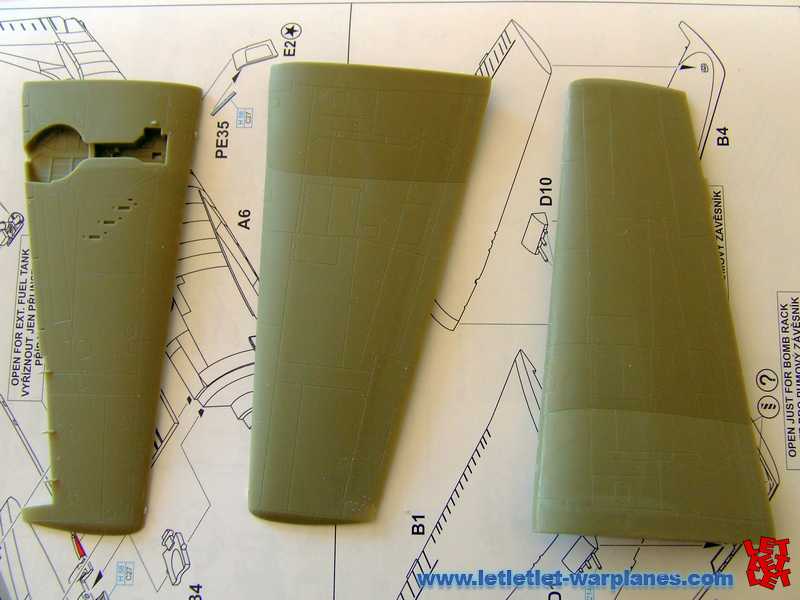
Wings are also nice mold and very simply, you need to assemble two top and two bottom parts and work is complete. I would like to suggest to avoid use of parts D11 and D10. This part carry machine guns tube but problem is that they will make problem in access section between them on leading edge and sand of the exceed glue. I did not use this parts and machine gun tube was later made from Albion Alloys tubes.


Wings and horizontal tail are mounted on fuselage slots and must say that this is smart solution to get very rigid connection with this parts in correct angle. Placing of the landing gear is the next step and it going so easy. Maybe better not to completely finish landing gear, let the tires wait to be mounted in last step of build, this will make much easy painting. One important point- part D27 present tail wheel and it must have panel line on the middle. Please note this, do not sand this. Problem is that this part come on the place where mold is separating so maybe some modelers could think it is mold release flush.
It is on you are you going to use some of the external stores or not. Eduard give nice elements to make war loaded machine as well there is various rockets, fuel tanks as well bombs. Please note that among the parts which are not allowed for use in this pack, is the parts 28 and 29 and it look like the cannons mounted later on Hellcats in French service. This promise that we will have in future some very nice releases from Eduard, like French machines.
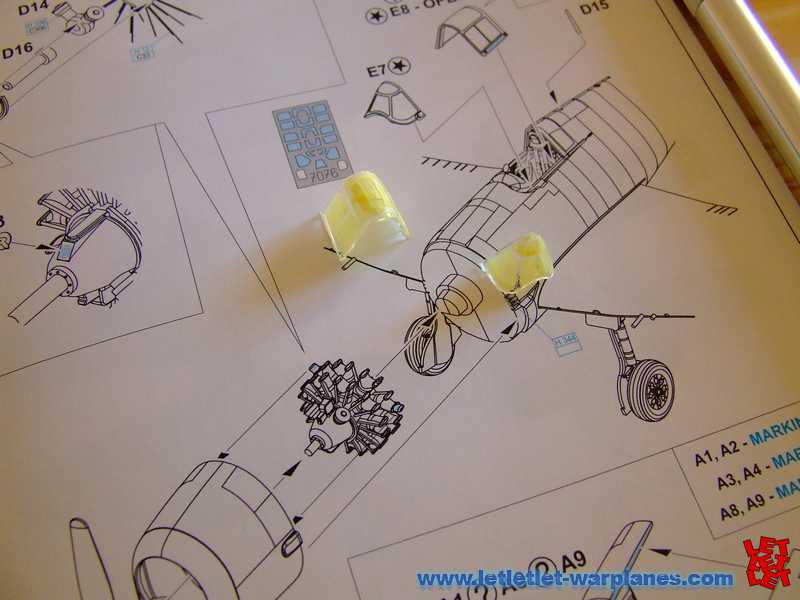
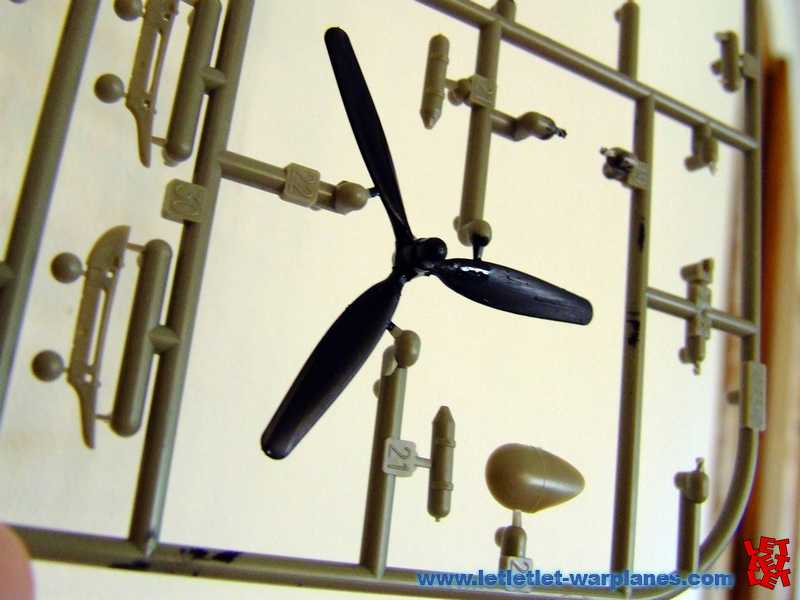
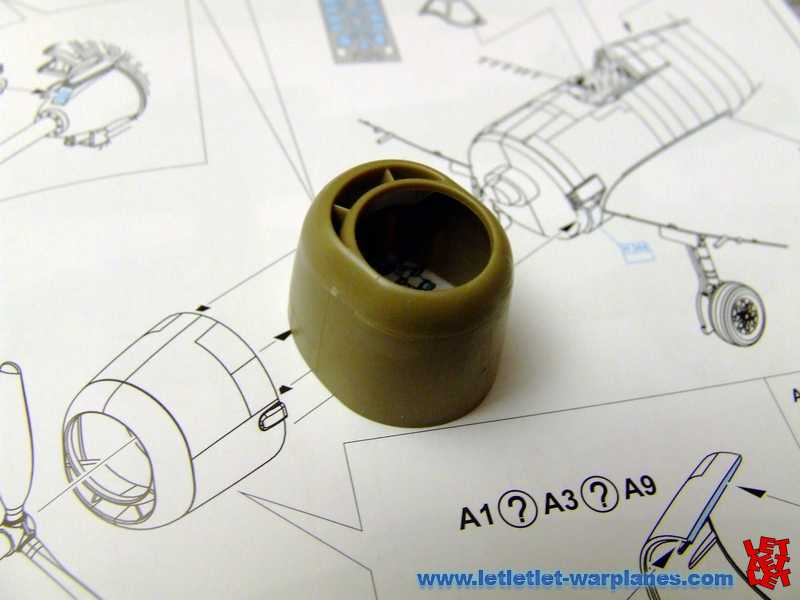
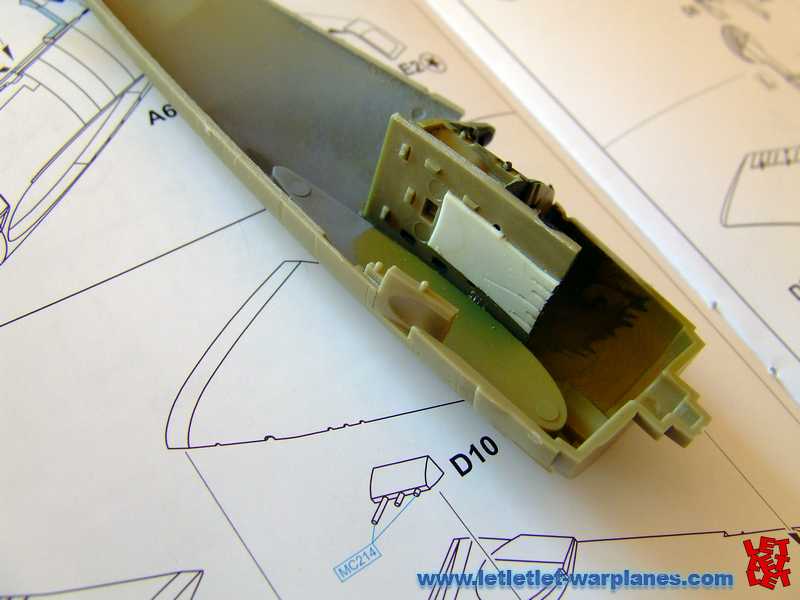
Engine assembly goes easy and it is welcome that Eduard provide some etched parts like electric wires for engine, it is easy to place and give extra good look! My suggestion is to take attention which version you will built as well you have three different models of engine cowling. Please note that you can place cowling on fuselage an complete paint it and later take it of, place engine and turn engine cowling back. This make protection work minimum and complete work much easy.
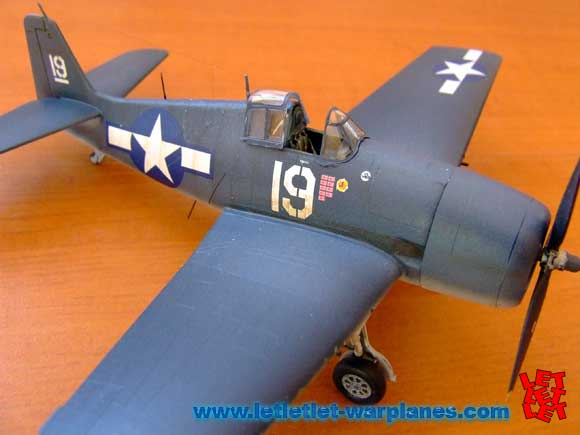
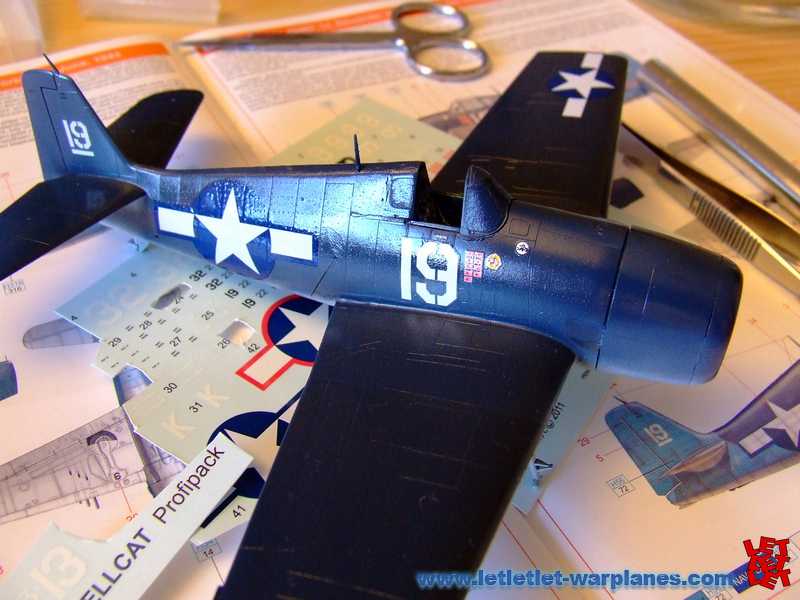
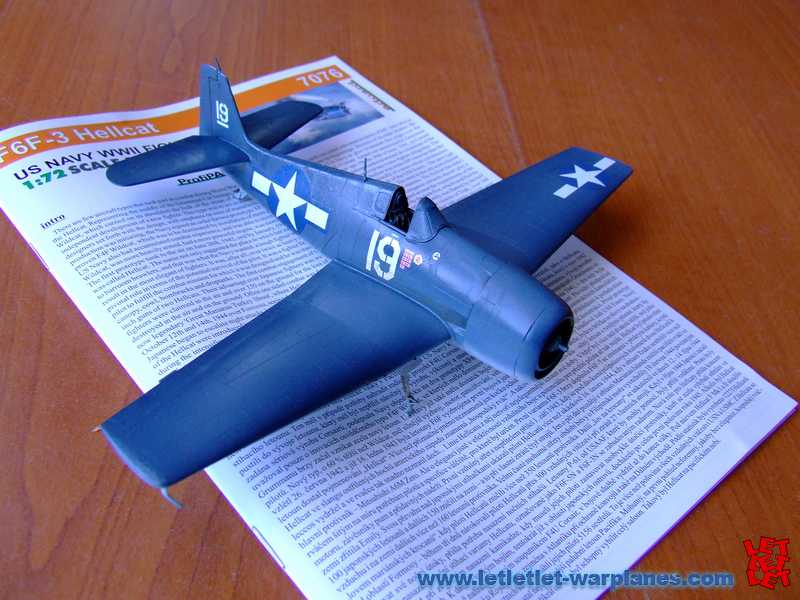
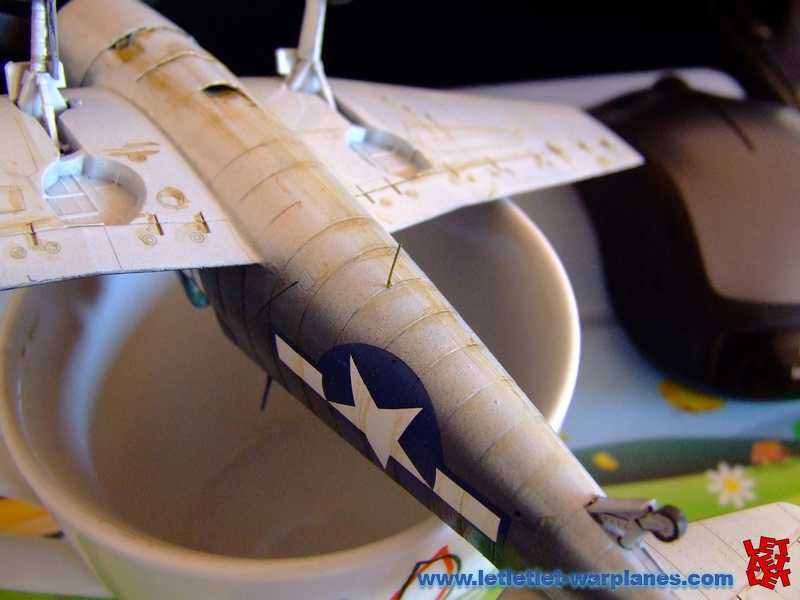
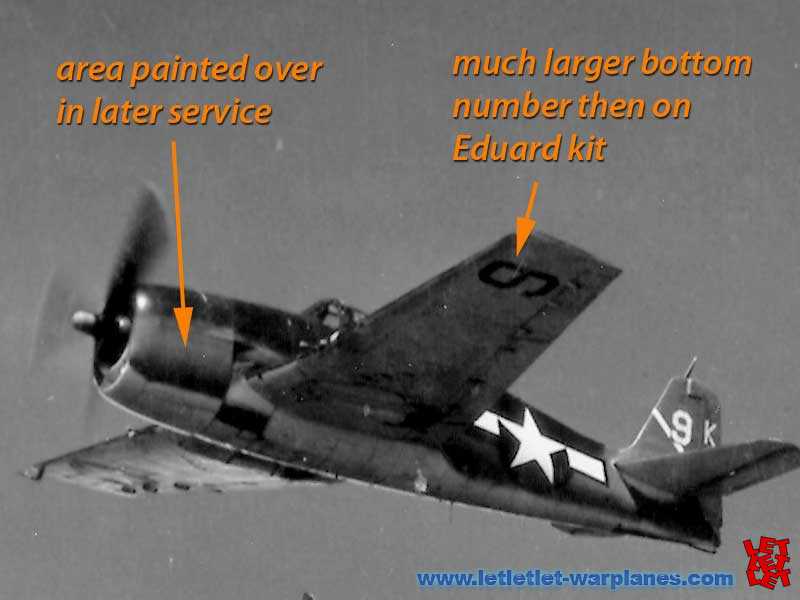
For painting you have provided five samples to be completed. First at all is the machine flown by VF-16 on USS Lexington, white 32 on fuselage. Note that available image of this machine show it in very worn out look. Next one is machine flown by Lt. C. K. Hilderbrandt from VF-33. Under C were provided Hellcat flown by Lt. William C. Moeseley from USS Yorktown. It is well known machine with hand painted ferry number 890 on cowling and this number was later painted over. To regret, Eduard miss to provide correct number under the wing which need to be much larger. Also this machine were much worn out in service. Nice to see that next machine is the one flown by Alexander Vraciu, famous one with number 19 and which is subject of this build. Last one is the Sample from VF-27, USS Princetown, flown by Lt. Richard E. Stambook.
Kit have some issues with panels but this is minor problem. In general kit is nice detailed, very easy to assemble and with nice decals. Very recommended!!!
Srecko Bradic
Sample kit is provided by Jan Zdiarsky from Eduard


You did a great job on that build! It looks like an excellent kit.
Thank you Jon 🙂 It is true, nice kit at all!