Show Posts

This section allows you to view all posts made by this member. Note that you can only see posts made in areas you currently have access to.


Messages - Second Air Force

Pages: 1 ... 310 311 [312] 313 314 ... 336
4666
Aircraft Modeling / Re: April Group Build--F4U Corsair
« on: April 04, 2011, 05:33:22 PM »
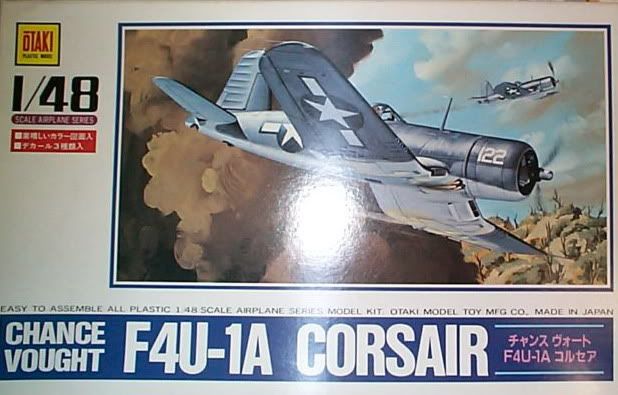
Yes, but you are dealing with a lot more parts than I am! :-ok The Otaki kit has beautiful molding and surface detail on the exterior but the cockpit and engine are very basic. If memory serves there are between forty and fifty total parts in the Otaki/Arii kit.

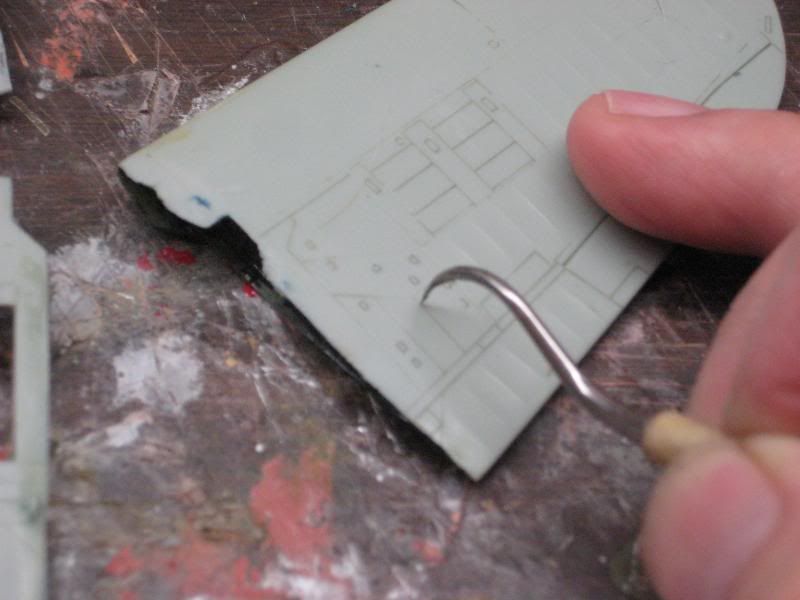
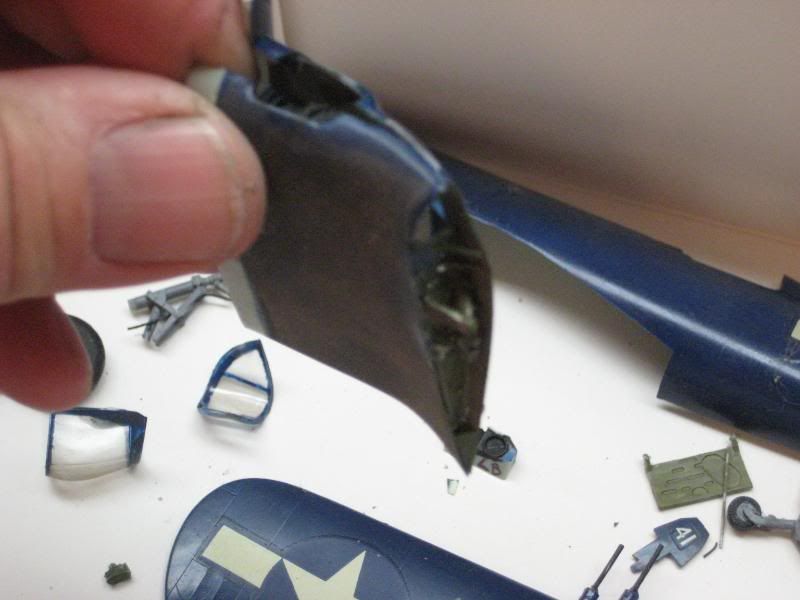
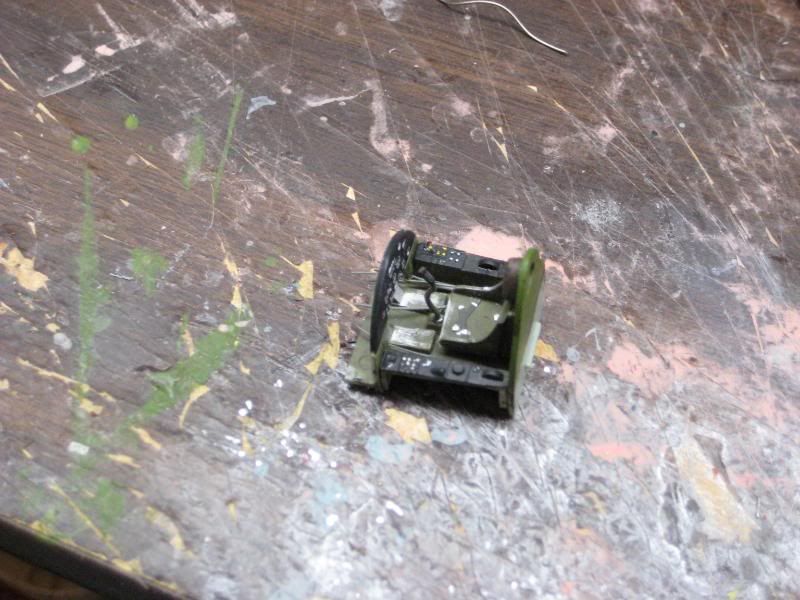
Here's a little progress, first on the cockpit before I finished adding some details to the sidewall consoles. This is still going to be an almost out-of-the-box restoration so I can preserve a little of the original workmanship:
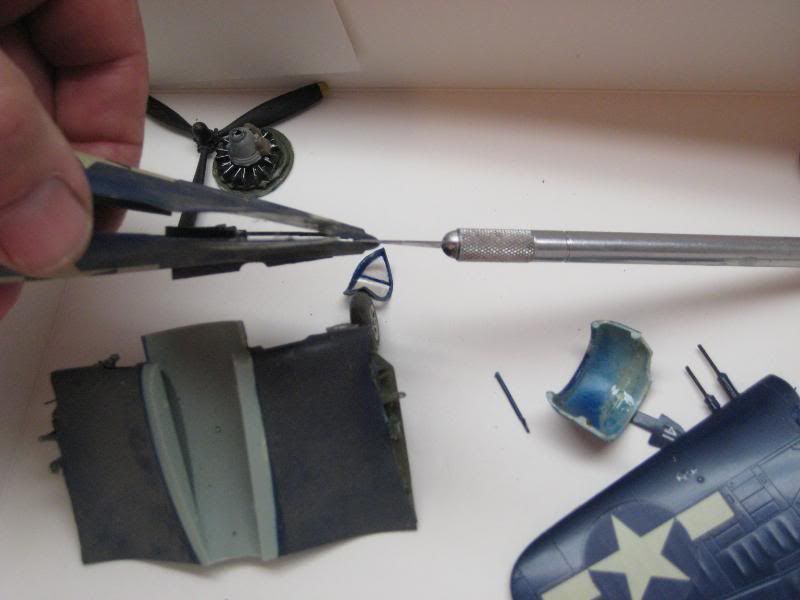
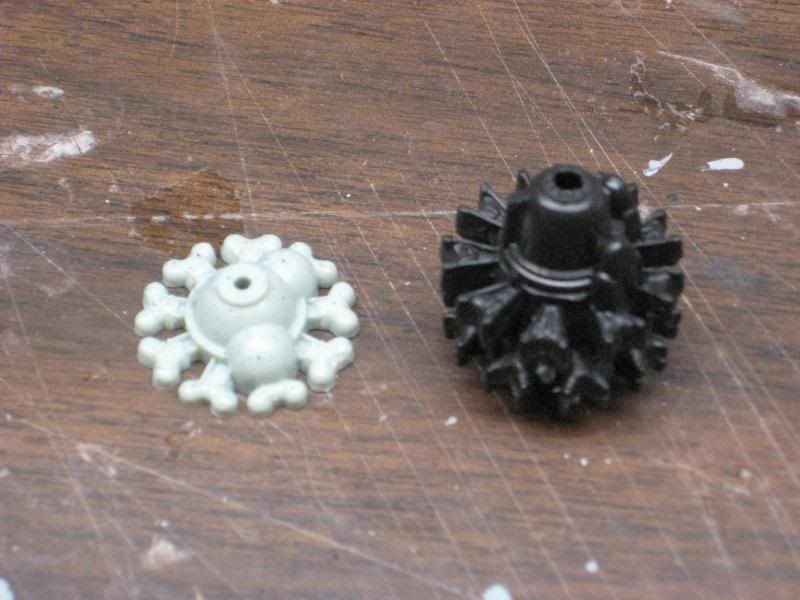
http://i174.photobucket.com/albums/w117/2AF/IMG_6642.jpg


The engine from Otaki is simply a blob :-red, the only thing in the kit that is useless. Here is the original next to a Monogram R-2800 from the P-61. The Monogram part has been replicated in resin for this and future projects.
http://i174.photobucket.com/albums/w117/2AF/IMG_6651.jpg


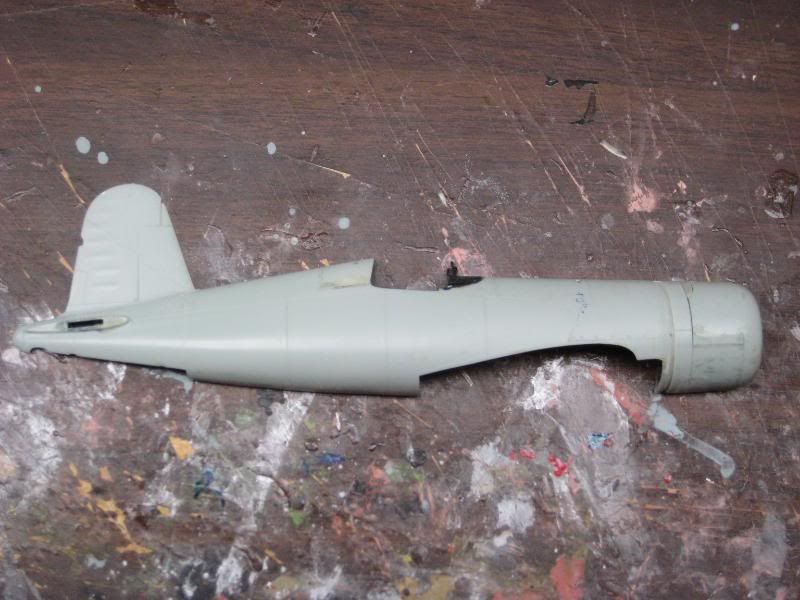
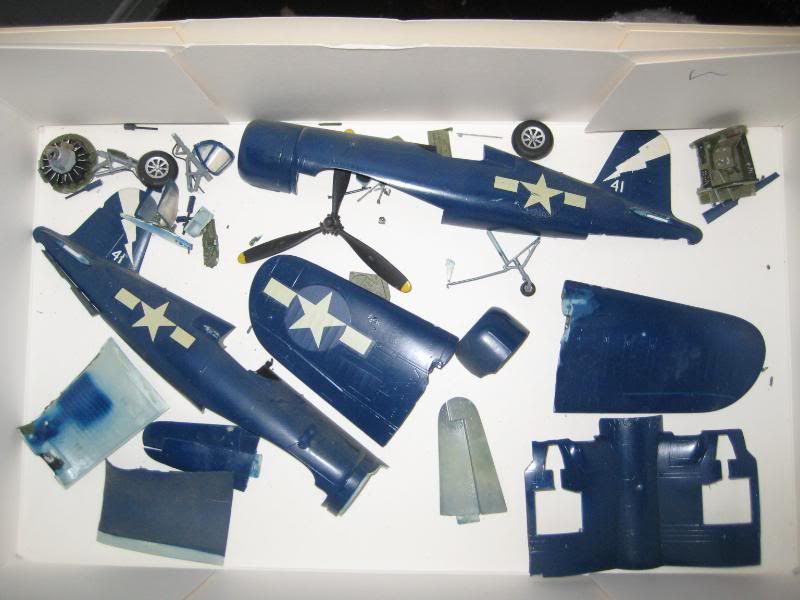
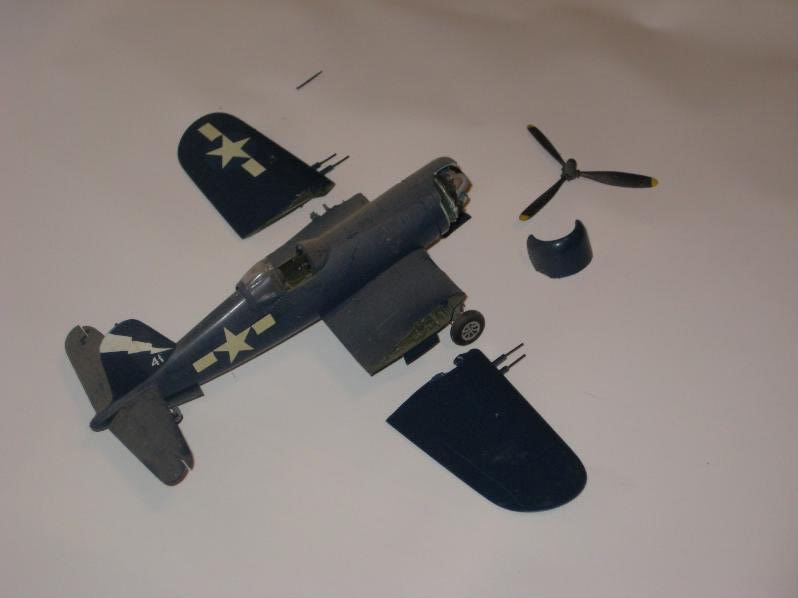
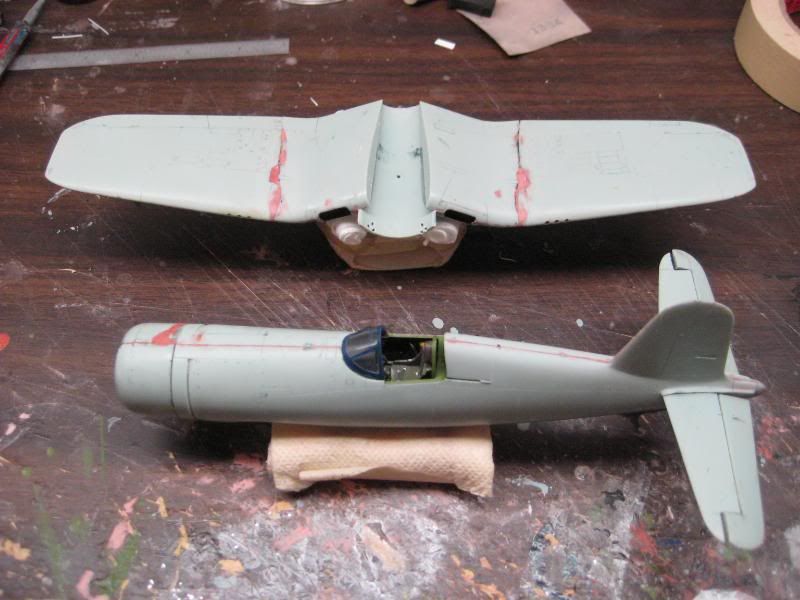
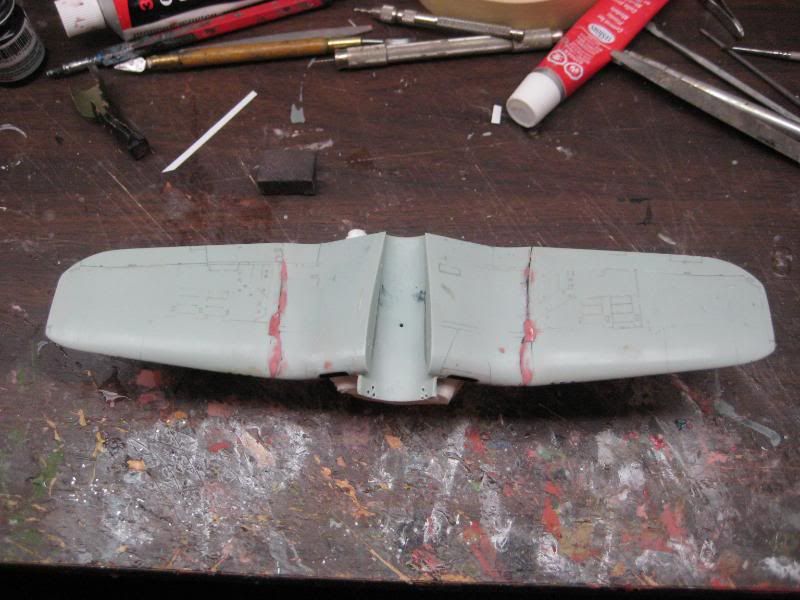
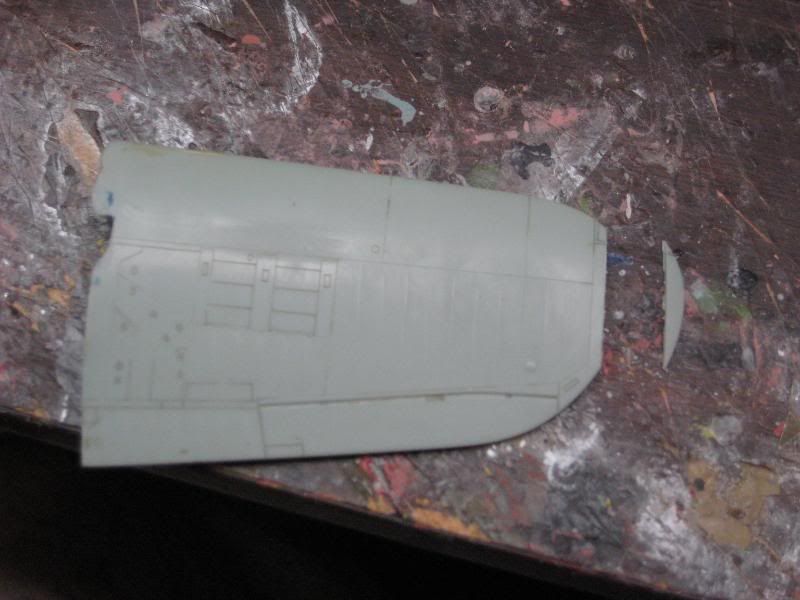
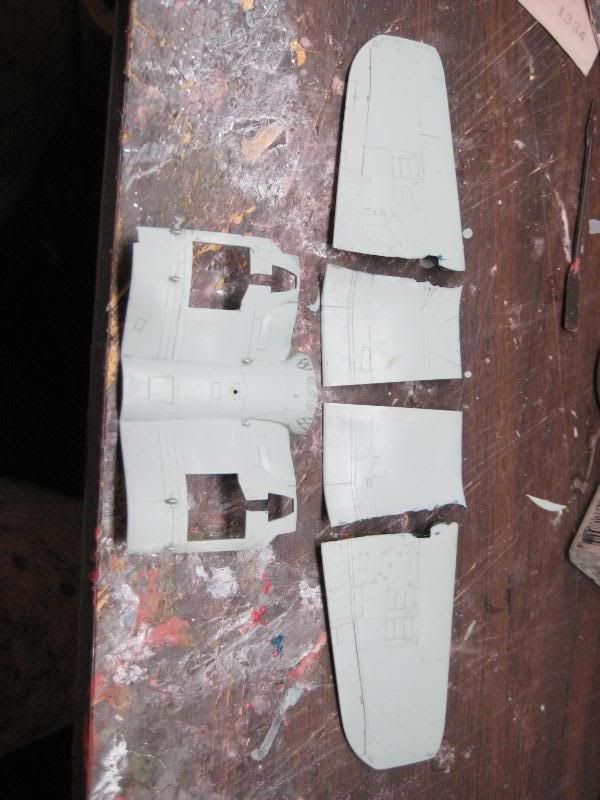
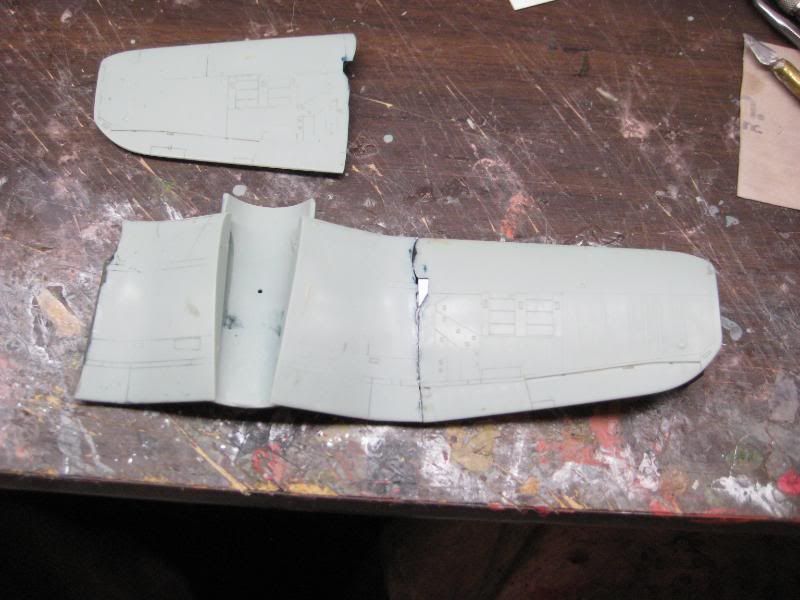
Here are the principal assemblies nearly ready for a little primer and more sand-and-fill action.
http://i174.photobucket.com/albums/w117/2AF/IMG_6652.jpg


4667
Aircraft Modeling / Re: April Group Build--F4U Corsair
« on: April 04, 2011, 12:07:37 AM »
Not too bad, Sall, but there is a bit of the "fill and sand, fill and sand" routine to go through. I made some spars out of scrap material to help guide the wings back together and used some CA glue here and there. I'm heading up to work on finishing the wing for primer right now.

Here's the finished wing assembly just before a primer coat. You can just make out the little hinge doors I had to build to replace the ones I cut out to fold the wings.
http://i174.photobucket.com/albums/w117/2AF/IMG_6640.jpg

4668
Aircraft Modeling / Re: April Group Build--F4U Corsair
« on: April 03, 2011, 11:53:23 PM »
With all of the paint removed from the principal parts it's time to examine my "work" from thirty years ago.

I had scratchbuilt the wing fold parts when I built this model but the parts didn't hold up to the moving damage over the years. I decided that it would be much easier to fix the wings in the flying position. As it turns out, that wasn't too easy either! I'd done a pretty accurate job of splitting the wing sections but there are some folding doors involved with the linkage that I had to remake. I also made a fixture to hold the outer wings in the proper dihedral for joining. Here are a couple of in progress shots of the wing rebuild:
http://i174.photobucket.com/albums/w117/2AF/IMG_6621.jpg

http://i174.photobucket.com/albums/w117/2AF/IMG_6625.jpg

http://i174.photobucket.com/albums/w117/2AF/IMG_6628.jpg


I also removed the cannon barrels and shrouds and reopened the .50 caliber ports in both outer wings. Thankfully the filler was easily found and removed from the original holes.

4669
Ground Forces / Re: KV-1 (Tamiya 1/48)
« on: April 03, 2011, 10:43:06 PM »
Years ago I was helping judge an IPMS Regional contest here in the States and a co-judge said that armor wasn't all that hard to paint :-eek. The rest of us set him straight as best we could, but it would do that fellow good to see all the steps you're doing to make this KV look realistic. Maybe then he'd understand!

Scott

4670
Aircraft Modeling / Re: Glenn Martin MS-1
« on: April 03, 2011, 10:36:24 PM »
  :-wall Did any small parts get swallowed by the Carpet Monster? :-wch That seems to always happen to me....... It's looking great even with the setback!

4671
Aircraft Modeling / Re: April Group Build--F4U Corsair
« on: April 03, 2011, 04:53:09 PM »
I like the look of your new versus my old parts here! :-eek

Here's the next step in my restoration build. After disassembling everything (except the outer wing panels, I left the halves together on these) it's time to remove the paint. These old Otaki kits have really nice surface detail with delicately scribed panel lines and fabric detailing and I didn't want to lose that by sanding. The best solution was EasyOff oven cleaner, a product I've used to strip paint on automobile models in the past.

A word of caution on paint stripping--always make a test on some part of the painted model that you could easily replace if the stripper ruins it! I take a gear door or something else you can easily scratchbuild and apply to that part first. If the test is successful, then the balance of the kit may be stripped. We have a thread over on WIX that addresses these methods right now: http://www.warbirdinformationexchange.org/phpBB3/viewtopic.php?f=15&t=40234

So, I knew that EasyOff works on Otaki plastic. The next step is my "frying pan spray booth". I just put the parts in the pan and sprayed a liberal coat of oven cleaner on them. After soaking for an hour or so I washed off the residue and removed as much paint as would easily come off. A second application was necessary for most of the parts. When down to the primer I had to use my fingernail to carefully scrape the final bits of residue from the surfaces. Oddly enough, the flat black and interior green didn't come off of the parts. If I recall they were both Humbrol paints while the blue was Testors. This might be the reason the stripper didn't work.
http://i174.photobucket.com/albums/w117/2AF/IMG_6600-1.jpg


http://i174.photobucket.com/albums/w117/2AF/IMG_6601-1.jpg


http://i174.photobucket.com/albums/w117/2AF/IMG_6616-1.jpg


"Fume free" is not totally true--this stuff stinks :-danger and I recommend spraying it out-of-doors if possible.

Once the paint was removed I went back and cleaned the residual out of all the panel lines by using my scriber lightly:
http://i174.photobucket.com/albums/w117/2AF/IMG_6627.jpg

4672
Aircraft Modeling / Re: April Group Build--F4U Corsair
« on: April 02, 2011, 11:15:27 PM »
So.....I decided to strip the paint off the entire model. My first step was to disassemble the remains. As it turned out I had used Testors tube glue on this kit all those years ago and it was quite brittle. Most of the seams were easily separated by just lightly flexing the parts to start the loosening. In some cases a very soft touch with an X-acto blade helped to pry the pieces apart:
http://i174.photobucket.com/albums/w117/2AF/IMG_6591.jpg


http://i174.photobucket.com/albums/w117/2AF/IMG_6590.jpg


And here are all of the parts after disassembly. The only seam that didn't separate where it should have was the trailing edge of the rudder, and then only a small area broke free, easily fixed. The cockpit is in fair shape and I'll refurbish it as an assembly.
http://i174.photobucket.com/albums/w117/2AF/IMG_6599.jpg


Next, paint removal....... :-danger :-danger

4673
Aircraft Modeling / Re: Academy A-10A Warthog 1/72
« on: April 02, 2011, 09:46:25 PM »
I'll enjoy your build, Sall. I built an ESCI A-10 many years ago and used this scheme:
http://i174.photobucket.com/albums/w117/2AF/SpottedHog.jpg


Here is another photo of two of the ships that wore this spotted scheme:
http://i174.photobucket.com/albums/w117/2AF/SpottedHogs2.jpg


This was an experiment done in the early days of A-10 use and the trials were being done at Nellis AFB as I recall. Nothing came of it, but they remind me a little of some of the Italian WWII schemes.

Have fun with your Warthog!

4674
Ground Forces / Re: M-5 Bomb Trailer
« on: April 02, 2011, 09:21:38 PM »
We were working in the yard and garden this morning and I pulled the real trailer out of its winter parking spot. Here are three pictures of the two trailers together to finish up this thread. Next I have to make the 1/1 trailer look like the 1/48th version!!!!!! ;)
http://i174.photobucket.com/albums/w117/2AF/IMG_6636.jpg

http://i174.photobucket.com/albums/w117/2AF/IMG_6638.jpg

http://i174.photobucket.com/albums/w117/2AF/IMG_6639.jpg

4675
Aircraft Modeling / Re: Zvezda MiG-21Bis 1/72 + BalkanModels
« on: April 02, 2011, 06:37:28 PM »
 :-ok

4676
Warplane Art / Re: Potez 630
« on: April 02, 2011, 06:36:29 PM »
YES! Fantastic scheme for the first version!

Scott

4677
Aircraft Modeling / Re: April Group Build--F4U Corsair
« on: April 02, 2011, 05:05:16 PM »
Thanks, Sall. We talked about whether it was appropriate for me to restore an old model in this build or only a new kit. Usually, especially when the builds are "competitive" in nature, everyone starts with an unbuilt model. Since we're here to share our methods and enjoy each other's work, I'll go ahead and include my toils in the Group.

My model was built in 1980 or so as a gift to my then-fiancee, now wife. The F4U has always been Ellen's favorite fighter plane so I built this Otaki for her to display at her apartment. I folded the wings so it would fit in the space available. The paint scheme was for a F4U-1C of VBF-99 from U.S.S. Shangri-La, CV-38. During our various moves around the country the airplane was damaged and has been in a box since 1989.

Here is what I started with--thankfully all the pieces (including a thick layer of Arizona/Oklahoma/Texas dust) except one main gear door were still in the box!
http://i174.photobucket.com/albums/w117/2AF/IMG_6485.jpg

http://i174.photobucket.com/albums/w117/2AF/IMG_6488.jpg


4678
Aircraft Modeling / Re: April Group Build--F4U Corsair
« on: April 02, 2011, 07:55:36 AM »
For me two weeks is enough for mode build and I will start my today ;)

Mine's done:  :-tri
http://i174.photobucket.com/albums/w117/2AF/IMG_6632.jpg


Just kidding, I had to use the April 1st gag one more time. :-roll

4679
Aircraft Modeling / Re: April Group Build--F4U Corsair
« on: April 02, 2011, 07:01:43 AM »
We can just stretch this build out for a longer period so that more can participate. Whenever you wish to join the group is fine as far as I am concerned, no deadlines need apply! :-flo

4680
Aircraft Modeling / April Group Build--F4U Corsair
« on: April 01, 2011, 07:57:24 PM »
It's time to begin the April group project, the Vought Corsair, of long service in several military forces.

I confess that I'm not doing a conventional kit build-up in my case, mainly because I've been using my modeling "allowance" on some Fairey projects. :-ok After discussing it on the Group Builds thread, I'll be restoring an old kit that I built in 1980. Here is the box art cover that mine came in, the Otaki/Arii kit of the seventies:
http://i174.photobucket.com/albums/w117/2AF/Otaki.jpg


Pages: 1 ... 310 311 [312] 313 314 ... 336