Eduard MiG-21PF
The MiG-21PF was the production version of the all-weather interceptor and second generation of this fighter. It was produced 1961–1966 and included advanced radar, missiles and a more powerful engine. And this plane presents the next step in Eduard production line, following successful series of these kits in 1/48 scale.
The first kit is released as Profi Pack and it has stock code 8236. It is a multi media kit with seven frets of injected plastic (one of those is transparent), two sheets of etched parts (one is painted) and a protective mask sheet. Many of the injected parts are not to be used in this kit, my guess it is for other kit releases. Decals are rich and there are two sheets of decals, one for the stencils and the other one for national insignia and unit markings and numbers. Following samples could be made from decals:
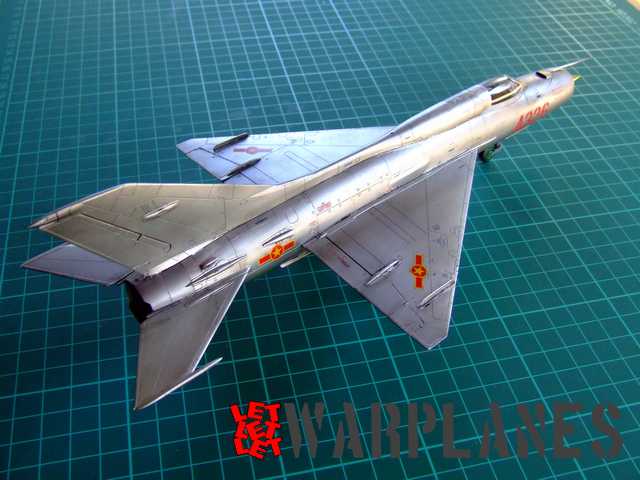
- 921st Fighter Regiment, Vietnam, Late 60s / Early 70s
- Serial Number 761008, Jagdfliegergeschwader 2, German Democratic Republic, Trollenhagen Air Base, Late 80s
- Soviet Air Force, Ceske Budejovice Air Base, Czechoslovakia, late August, 1968
- 702nd UAP, Chernigov Air Base, Soviet Union, 1980s
- 1st Fighter Regiment, Polish Air Force, Minsk Mazowiecki Air Base, 1980s
The kit is very simple and easy to build, as are all of the Eduard kits of MiG-21. Start goes parallel on instrument panels and the engine. Before starting work on cockpit elements, note that there is the option to use plastic parts and use decals for instruments and the other one is to use etched parts. I used etched parts and this demanded some surface preparation as well to paint some parts. During this painting process, you can also paint all interior parts and engine parts. Note that model PF has an additional windscreen in cockpit, please paint this one too. Eduard suggests grey color for finish of this part but please note it could be also black.


Fuselage assembly includes assembly of cockpit, landing gear bay and engine and placing them inside before merging the fuselage halves. On top of the fuselage goes the spine with vertical tail. Take attention during the wing assembly to drill holes for under wing pylons, take a study of the version you are going to use before drilling the appropraite holes. It would be good to paint interior of landing gear as well some parts would not be possible to paint later properly. When wing parts are assembled, they go to the fuselage, first bottom part and then come two top wing parts. In this step can be also placed horizontal tail.


The ejection seat is left for last work on kit. It is very detailed and differs much from previous kits. There is the option to place the cockpit canopy in open or closed position, I decided to close it. Last step is for various small parts as well as the landing gear. And kit is ready for primer.
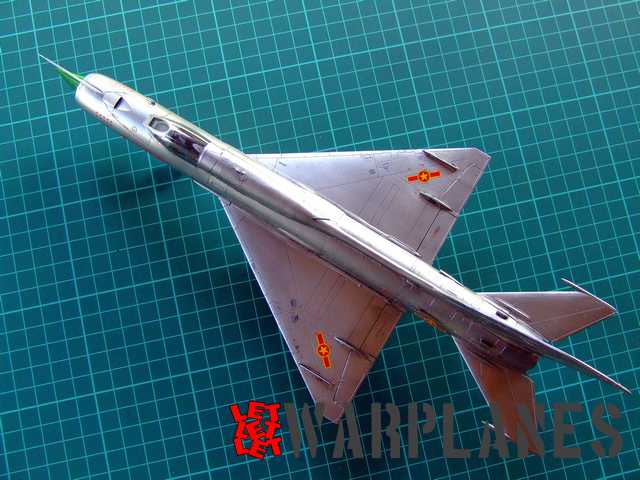
I completed this kit as the Vietnamese sample, used in the war. The entire kit is natural metal and to achieve top result I used Xtreme metal paints and final details were done with Ultimate wash products. Note that it was a clean airplane (as seen on images). Must say this is great pleasure kit for build and Eduard did a great job again! I highly recommend this kit!!! You can find your sample here.
Srecko Bradic


