Strike Eagle
The Strike Eagle is one of the most powerful combat airplanes used in the last decades and it has proven its capabilities in several conflicts. No wonder that it was the subject of the various plastic kit manufacturers and possibly one of the best releases is the Eduard kit in 1/48 scale.
The kit presented here is the original Academy kit and Eduard released it as a Limited Edition. The stock number of the kit is 1177. The box is excellent and attractively designed and the content inside is also excellent. Main parts present eight plastic frets (one of them transparent) with kit parts, many resin parts (for the pilot seat, wheels and exhaust), two sheets of the etched parts (one with painted parts), one transparent film and two mask sheets (cockpit, wheels and gun port). Instruction booklet is 20 pages in size and inside is also two decal sets (stencils and unit markings).
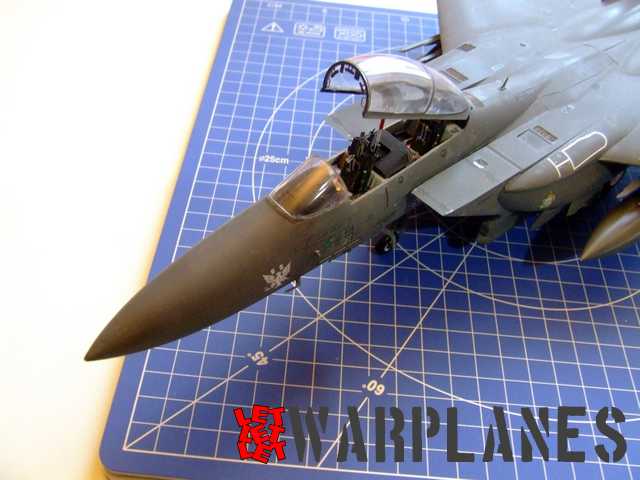
No matter that this kit includes a large number of parts; I found no difficulties during assembly. First of all you need to take a look at the whole content and from the very start make a choice as to which final kit you would like to finish. The reason for that is that you will find different types of elements inside and you will face this on the very first assembly page where is shown assembly of the cockpit canopy. The canopy is well detailed with etched parts (no resin at all for cockpit except the seats) and first thing to do is to sand all surfaces of side consoles, instrument board and floor from original elements. After that I put all etched parts, but only non-painted ones. I have done it in order to spray a coat of interior paint and after drying to complete with the rest of the parts, pre painted. Main cockpit elements are placed inside the cockpit tub and the rest are on the interior fuselage side walls. In general this presents front section assembly as well this all are the nose of the airplane. When it is assembled you need to join it with the rear fuselage section. This front section contains cockpit interior, front landing gear leg and weight (don’t forget to add weight before cement front fuselage halves).
no images were found
Assembly instruction then progresses on to the fuselage/wing assembly. I decided to do steps a bit differently, assembly instruction suggest to assembly whole rear fuselage section with wings and tail elements and exhaust and after that to put the nose section on it. I decided to complete first the whole fuselage without wings, tail and exhaust as I expected possible filler work on surface where the join line of front and rear fuselage sections are. There was also the need to cover surfaces, sand and after that re engrave again some lost panel lines. Certainly working with only the fuselage is better for handling. The kit demands some filler work but it is not bad at all, I assembled it in good shape with smooth surfaces.
When fuselage was completed I mounted the wings and tail surfaces and they fit well. I took some time to assemble the exhaust elements. They have many parts and the same resin is designed with outstanding details. These details of the basic resin parts are additionally enhanced with etched parts on the external side as well as inside. No matter that the instructions suggest placing of these elements in the mid of the assembly, leave them aside and place them on kit when it is completely finished (painted, decal work and final top coat). The same I have done with the seats, I completed them and put on the kit in the final stage of assembly.


This kit has very good external ordnance but not all what could be demanded for the final finish. What is important to note is that Strike Eagle always have something attached (at least electronic pods and external fuel tanks) so take a look on the images of the actual airplane before consider what to place on the wing and fuselage pylons.
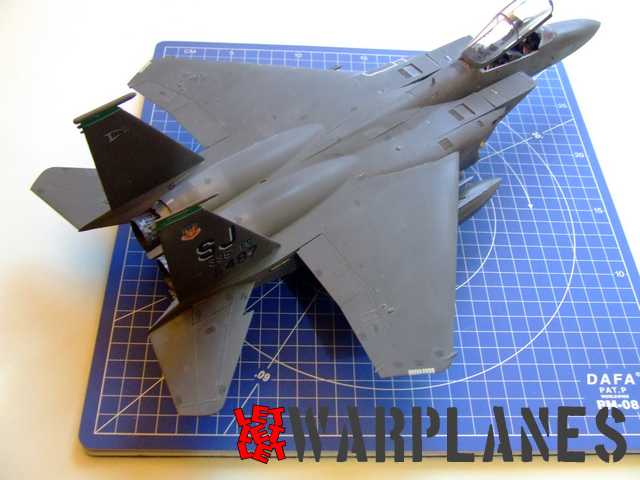
The kit includes decals for four aircraft samples. Three of them are US machines and one of the Israeli sample. My decision was to make machine F-15E, s/n 89-0487 from 4th Fighter Wing, BagramAB. This machine is credited for an aircraft kill and this is interesting detail for me. The whole plane is simply finished, overall dark grey color. Kit also includes two variants of stencils and they took most of the time to be placed, the same decals for the unit markings and national insignia take little time to be placed. I have lightly weathered the kit; in general it is a well maintained machine.
Final assembly presents placing of the wheels, ordnance and pilot seat and canopy. With its size and details it is a very attractive kit and worth every coin you give for it. I recommend this kit!
Srecko Bradic
Special thanks to Eduard for free sample of kit.
Albion Alloys tools and materials were used during kit assembly.


