Eduard details for Hawker Typhoon
The Hawker Typhoon has become a very attractive subject in last month’s/year and a few very interesting kits have been delivered with the focus on 1/72 scale. Eduard monitored this situation and adapted their product line with great releases. As you may guess, they delivered update sets and we talk here about the detail sets for the Airfix kit in 1/72 scale.
Eduard delivered three sets for the very new Airfix kit and these are Flaps, Cockpit and All in One set. We will treat here the first two sets and the last one will be mentioned as a link. In this case we decided to give a different approach to the subject. I am sure you have noted that reviews here are done by the experienced modelers with a few decades of modeling behind them. In this case we decided to give our youngest team member who is 15 years old the assignment of this product build. He has less then one year of modeling experience and our interest was to see how can this detail set be used and applied by a less experienced person. This text is based on his model build notes.


First of all–the Airfix kit is very easy to assemble and fits well and this makes it a good kit even for beginners. We did not take any measurements to determine accuracy of the kit but this is not our goal. First what has been done is the painting of the cockpit interior in grey green color, British standard interior color. While the paint was drying, the flaps were removed from the lower wing panels. That was done with engraving needle, very deep lines were engraved on the flaps line and then it was cut with a very sharp knife. We recommend no. 11 blade but it is on you what you will use as your best choice.
On the cockpit side the parts were cemented in place and most of them were on the port side. After that the excellent pre-painted instrument board was assembled and lower parts were bent as they represent the side consoles. For the floor was prepared belts for the foot controls. This part of work progressed fast, even with less experience it take no more then half an hour to complete it. A little more work was needed for the pilot seat. Eduard provides this seat as a basic metal part which needs to be bent into the shape (almost the same way as the original industrial product). After that the seat gets a leather painted back and pilot’s belts. In total all etched interior was completed in some over two hours.


Fuselage assembly was easy, first of all the interior elements were placed on the fuselage starboard side and then the other fuselage half was placed and cockpit closed inside fuselage halves. All fitted inside perfectly and symmetrically. Most of the work there was done according to the original Airfix assembly.
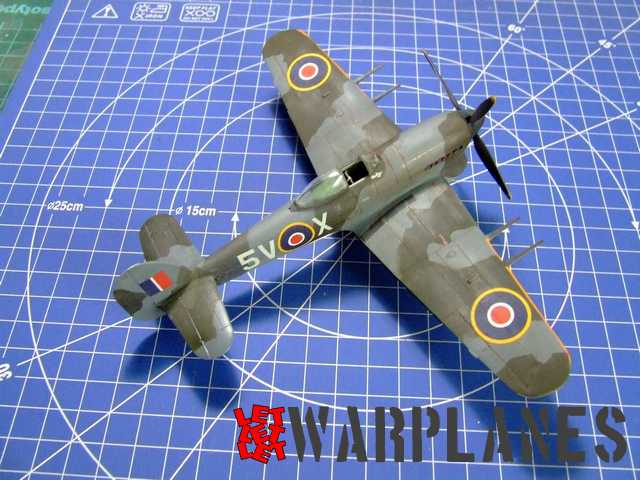
Now the focus was on the flaps. At first look it was a bit tricky due to the many ribs included there. But this was not a problem at all, even for our young modeler. Elements for the flaps consist of the basic frame which needs to be placed first and then the flaps in the lowered position. The wings of the kit needed to be assembled, sanded and cemented to the fuselage. Next the first flapwell section was placed; this goes on the top wings parts. This covers the gap there and makes the base for the next set. Next assembly presents the drop-down elements and they are much similar to the previous set, a plate with a number of ribs which need to be bent back into position and cemented there. There is a good guide line and there were absolutely no problems that occurred during this part of work. When the flaps were completed they were cemented on the bottom of the flaps box and on the back line of the bottom wing surface. They are positioned at 45 degree. No matter that it looks complex on the image, it took just 1.5 hours to be completed (and don’t forget this was done by 15 years old modeler).


The rest of this build presents surface finishing and painting and you can see the images of the completed kit. This build proves the excellent quality of the Eduard photo etched set, great enhancement of the visual look of the kit and great authenticity. The basic kit is designed to be used by less experienced modelers and Eduard etched sets can be also used by the less experienced with great success. We give top recommendation to these products! Please follow links at the bottom to get your sample:
Flaps | Cockpit | All in one set
Great thanks to Eduard who provided free samples of their products for review.
Srecko Bradic
Model build by I. Rakonjac
Special thanks to Lubos Vinar from Hobbyshop for support of this build with free kit sample of Hawker Typhoon and Caraktere from France for the free sample of the magazine with reference article of Hawker Typhoon. Albion Alloys tools and materials were used in this build.


