Show Posts

This section allows you to view all posts made by this member. Note that you can only see posts made in areas you currently have access to.


Messages - Second Air Force

Pages: 1 ... 330 331 [332] 333 334 ... 336
4966
Arado 234?

S

4967
Aircraft Modeling / Re: HOW TO: Natural Metal Finishes
« on: May 16, 2010, 06:02:08 PM »
I believe the P-26s were used in the very early part of the war for some training duties and as "personal" airplanes in a few cases. They were also used in maintenance training schools for a time and I've seen pictures of them in standard olive drab/neutral grey camouflage in a Chanute maintenance school hangar.

The Filipino air arm fought bravely with their P-26s against the Japanese in the early days of the Pacific war, also.

Scott

4968
Aircraft Modeling / Re: HOW TO: Natural Metal Finishes
« on: May 16, 2010, 04:45:23 PM »
Beautiful three-view, No.1!

I can't decide if the small red panel just behind the cowling is truly red or fresh olive-drab to match the rest of the anti-glare panel in the photo. I'm thinking it was a replacement part in green, but I may use the red as you've done it.

These training airplanes were flown very hard and the maintenance crews were faced with shortages of spare parts. The Base Historical Records tell of not being able to get parts and tires because priority went to the combat zones first, then CONUS training stations. Bruning nearly had to cease flying for a short time because no tailwheel tire inner tubes could be gotten.

4969
Aircraft Modeling / Re: HOW TO: Natural Metal Finishes
« on: May 15, 2010, 10:30:40 PM »
Y36 was a P-47D-20RA built at the new Republic plant at Evansville. The serial is 43-25372.

One interesting thing about the Thunderbolts assigned to Bruning was that they got a lot of "oddballs". They had Curtiss-built Gs and the second prototype of the bubbletop variant ended up as a trainer there.

Scott

4970
Aircraft Modeling / Re: HOW TO: Natural Metal Finishes
« on: May 15, 2010, 10:01:50 PM »
Insignia red cowling.

The most interesting thing about the markings on this P-47 is that the factory painted the national insignia on the fuselage too far aft to put the standard ETO squadron codes on. Notice that the forward bar of the insignia is not painted onto the intercooler exhaust doors but is completely aft of the doors. This pushed the aft bar so far back that no letter could be applied. The insignia was repainted on combat aircraft, I don't know if it was done in-theatre or at mod centers. I also don't know if all the factories applied them this way or not.

4971
Aircraft Modeling / Re: HOW TO: Natural Metal Finishes
« on: May 15, 2010, 09:50:12 PM »
I found my P-47 and it is raining all weekend, so I may get a start on this project tonight and tomorrow. :-jump

I'll be building the NMF airplane in the photo, a D that was assigned to Bruning Army Air Field in Nebraska as a training aircraft. Ellen and I have spent many hours walking on what remains of Bruning AAF so this model will be a connection to our home state. It's hard to see from the picture, but the Jugs have only two guns per wing for training purposes.

http://i174.photobucket.com/albums/w117/2AF/IMG_4872.jpg


Scott

4972
Aircraft Modeling / Re: HOW TO: Natural Metal Finishes
« on: May 10, 2010, 07:13:45 PM »
I'm thinking of dusting off a 1/72 Tamiya P-47 that I started years ago so I can actually contribute to this thread. If only I knew where I stored it! :-think

Scott

4973
Aircraft Modeling / Re: HOW TO: Natural Metal Finishes
« on: May 09, 2010, 05:48:29 PM »
No.1,

If the "thinner" has dried up in your Metalizer products but there is a lot of the solid pigment still in the bottom of the bottle you may be able to use lacquer thinner to re-suspend the pigment. I've been forced to use lacquer thinner to revive a couple of bottles with good success.

Scott

4974
Aircraft Modeling / Re: Boeing Y1B-17 Project--1/48th Scale
« on: May 04, 2010, 07:55:44 PM »
I used to know a GREAT modeler that had no patience whatsoever. He had a nearly finished kit that something went wrong on and he just swept the entire model into the garbage can. It was a wonder that he ever finished anything far enough to show us. He eventually gave up the "hobby" because it was too hard on his health and wellbeing.

Scott

4975
Aircraft Modeling / Re: Boeing Y1B-17 Project--1/48th Scale
« on: May 04, 2010, 06:56:57 PM »
Just a quick update--I get to build the nacelle interior structure for the #3 engine one more time! :-wall :-roll I managed to destroy the first attempt yesterday when I moved some stuff around in my modeling area............I wanted to curse a little bit, but it was actually kind of funny. I work in a tiny space that used to be a storage closet/attic that I insulated and finished out. Our German Shepherd has decided it is HER room and I had to move my chair to accomodate her. She just looked at me with her head turned to one side and laid down.

Oh, well, we've all had to redo things in our modeling careers, haven't we?! :)

Scott

4976
Aircraft Modeling / Re: Boeing Y1B-17 Project--1/48th Scale
« on: May 02, 2010, 04:06:05 AM »
Here are a few photos of the bomb racks that I built several months ago:
http://i174.photobucket.com/albums/w117/2AF/IMG_3057.jpg


The kit racks depict (rather generally) the later style rack with a solid web between the two uprights. The YBs and earlier production variants used the type with separate intercostals as I've built:
http://i174.photobucket.com/albums/w117/2AF/IMG_3060.jpg


Here are all four racks, still needing most of the release mechanism and other details installed:
http://i174.photobucket.com/albums/w117/2AF/IMG_3064.jpg


And one of the racks test-fit into the bay:
http://i174.photobucket.com/albums/w117/2AF/IMG_3062.jpg


Scott

4977
Aircraft Modeling / Re: HOW TO: Natural Metal Finishes
« on: April 25, 2010, 04:48:33 PM »
No.1,

Does the Gunze white allow you to paint lacquer-based finishes on top of it? I like the overall finish it gives and would like to try it on my project.

Scott

4978
Aircraft Modeling / Re: Boeing Y1B-17 Project--1/48th Scale
« on: April 14, 2010, 08:12:56 PM »
I've actually removed the fairings in the second photo. The exhaust pipes on the real airplane sat in a groove in the nacelle and the scoop fairing was screwed on top of the groove. For the sake of laziness I just drilled an angled hole in the nacelle and stuck the exhaust pipe tubing in the correct location. One of my earlier photos of the interior of the wheelwell shows a plastic rod that represents the trough or groove that is visible in the wheelwells. After I've glued the wing halves together I will install the fairings--they actually sit on top of the nacelle as in the first photo you highlighted. I didn't want to damage the fairings while working on the individual wing pieces.

Scott

4979
Aircraft Modeling / Re: Boeing Y1B-17 Project--1/48th Scale
« on: April 14, 2010, 04:06:56 PM »
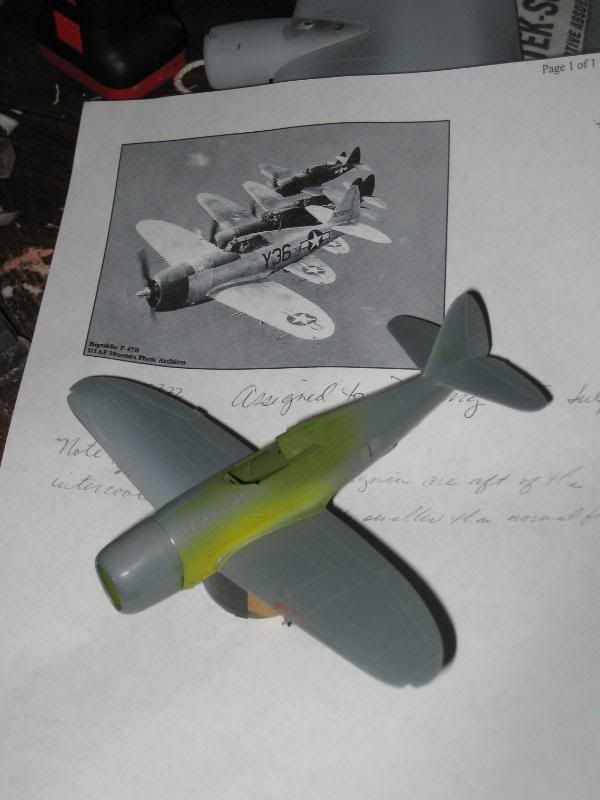
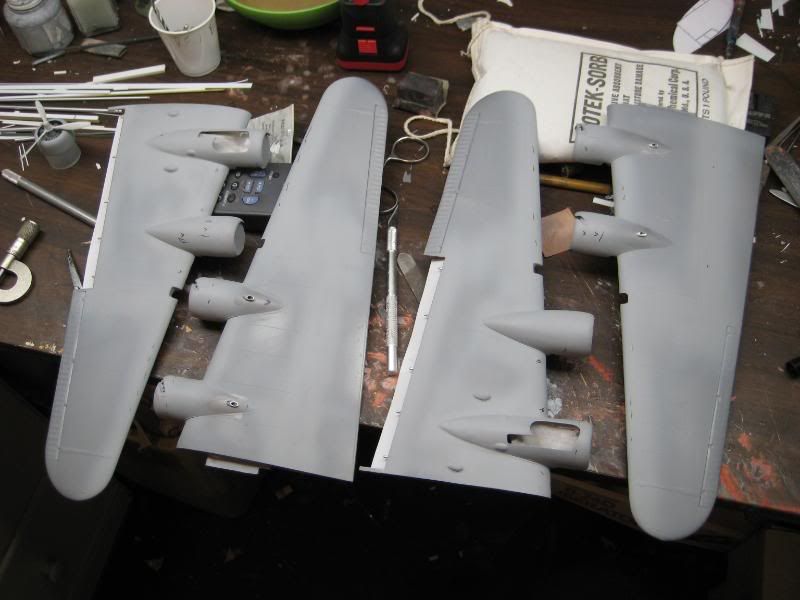
Yes, those are the exhaust stacks, No.1. I glued them into the wing surface when I was making the fairings. I decided to permanently attach them since it was a bit difficult to get the angles just right.

I've built a number of the Monogram B-17G kits over the years but never had the guts to try opening the bomb bay doors. It isn't all that much fun! :-wall

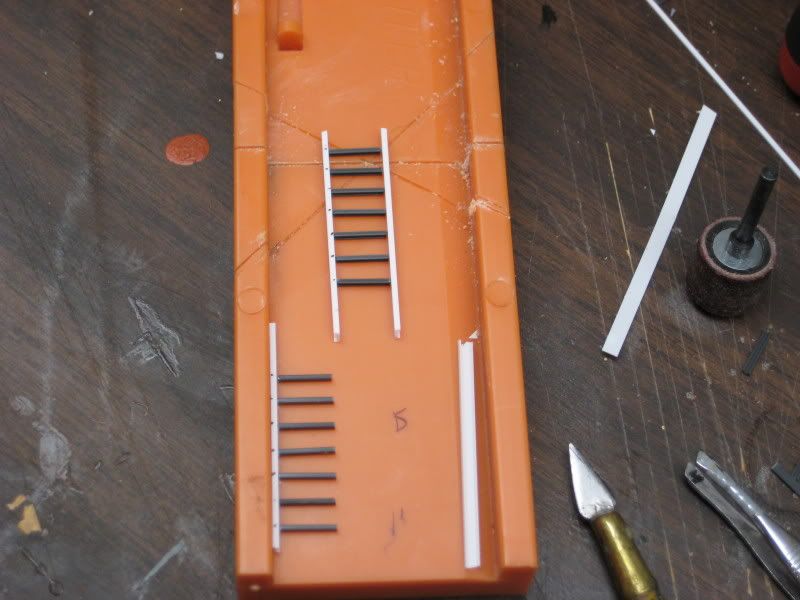
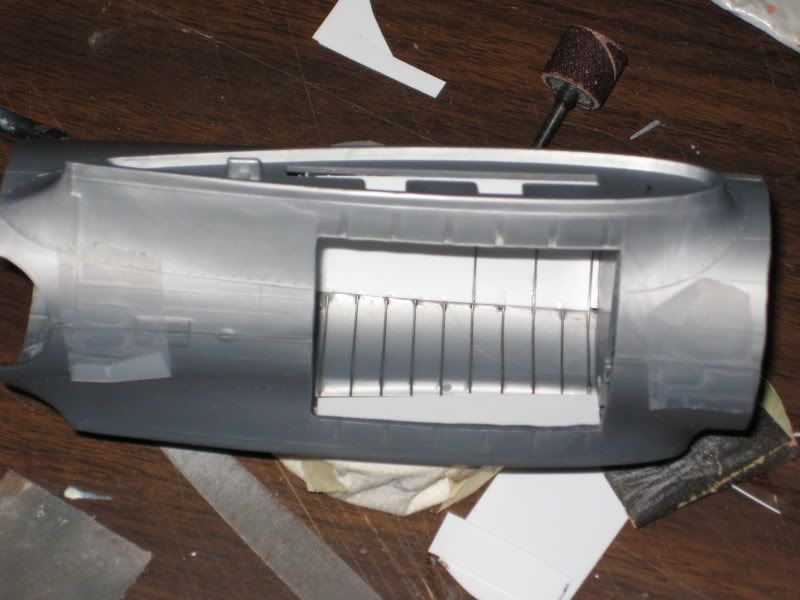
First, the real bomb bay is circular so you have to build an upper panel to cover the turtledeck opening. Then the internal structure has to be built to replicate the former rings and stringers in the bay. Here is a rough idea of how that looked during the process. The white panel is the filler for the turtledeck area.
http://i174.photobucket.com/albums/w117/2AF/IMG_2989.jpg


The forward and aft bulkheads also have to be built from scratch in order to completely plug the fuselage forward and aft. Flat covers were made to cover the wing root-to-wing junction on the inside of the fuselage, and the ears on the wings have to be trimmed so they don't impinge too far into the bomb bay. More on that area later.

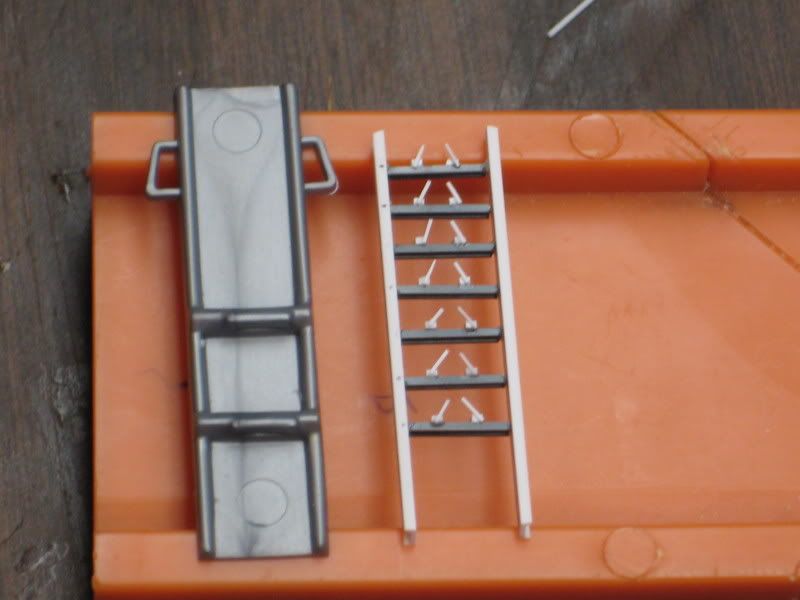
Next I started fabricating the center keel truss assembly. I dug out a visible B-17 kit so I could use the keel and bomb racks for a guide, but that wasn't really of much use. Fortunately I'd taken lots of photos of TR last year and have some good YB-17 references, so the truss is starting to take shape. Here is the aft wing carry-through getting started:
http://i174.photobucket.com/albums/w117/2AF/IMG_3029.jpg


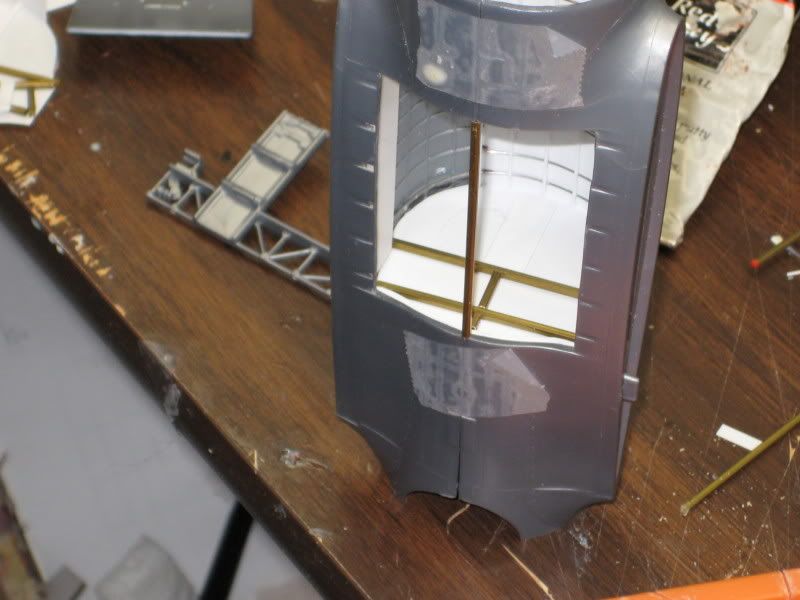
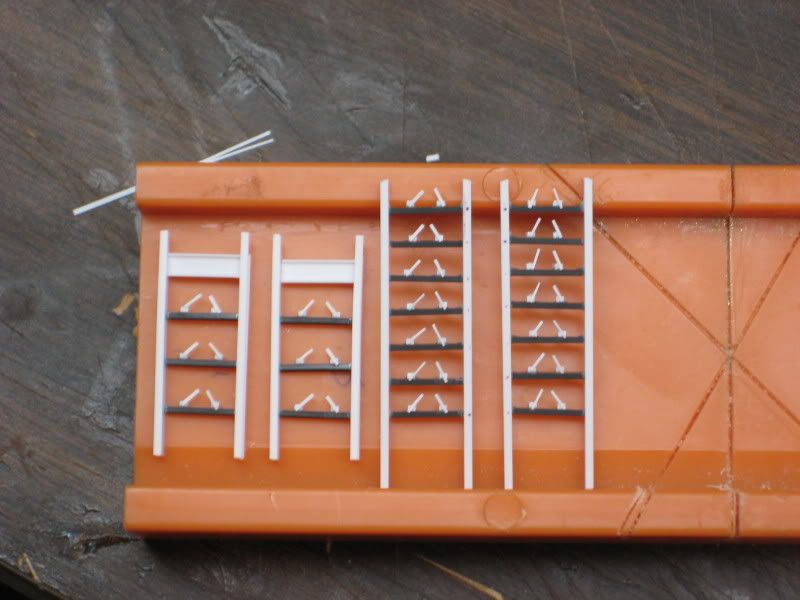
And this is the forward carry-through mostly complete. The lower beam of the centerline truss can be seen in the middle of the bay. The racks will fasten to this and the top of the fuselage later.
http://i174.photobucket.com/albums/w117/2AF/IMG_3025.jpg


Scott

4980
Aircraft Modeling / Re: Boeing Y1B-17 Project--1/48th Scale
« on: April 12, 2010, 02:17:55 AM »
It's been a while since I last updated this thread. I've been able to do just a little bit to the B-17, so here goes:
I finally applied the first couple of coats of primer to the wings, finding a LOT of touch-ups needed. There were the usual high and low spots and some other challenges to contend with. This photo is after the third prime/sand/fill session and I've marked flaws with a marker for the next round.

http://i174.photobucket.com/albums/w117/2AF/IMG_4763.jpg


I posted a few photos of the nose section on the Natural Metal Finish thread so I won't add them here.

Scott

Pages: 1 ... 330 331 [332] 333 334 ... 336