Show Posts

This section allows you to view all posts made by this member. Note that you can only see posts made in areas you currently have access to.


Messages - Second Air Force

Pages: 1 ... 328 329 [330] 331 332 ... 336
4936
Aircraft Modeling / Re: Boeing Y1B-17 Project--1/48th Scale
« on: November 12, 2010, 08:35:00 PM »
I am sure I've already done so, but here is another shameless plug for Koster vacuform kits. The fuselage halves fit perfectly into the original Monogram forward section with only a very minimum of work. I've never been disappointed in anything Mr. Koster has produced and can hardly wait to start working on the PB4Y-2 modification that I photographed earlier.

Scott

4937
Aircraft Modeling / Re: Boeing Y1B-17 Project--1/48th Scale
« on: November 12, 2010, 06:28:22 PM »
I tend to agree with Nico on adding transverse bulkheads in the fuselage. On this model I won't be able to add any full bulkheads as I want the entire aft fuselage to be open for viewing. Instead I'll build up several frames with longerons and stringers to help beef up the fuselage much like Boeing did it. Fortunately the Koster kit is molded of sturdy plastic and can be built without much additional strength.

Here's another little update. One of the modelers on WIX, Steve Nelson, posted a suggestion to use a marker pen to outline where cutouts are to be made and around the perimeter of parts when cutting from the sheets. I added that process into the update.

I followed the tip that Steve posted about outlining cutouts with a Sharpie and it is a nice guide for trimming, indeed. On a Koster kit there is a light outline molded into the parts such as where the horizontal goes through the aft fuselage. I simply ran the marker around the perimeter of the molded-in guide marks in this instance.
http://i174.photobucket.com/albums/w117/2AF/IMG_5763.jpg


I should mention for those who haven't done much vacuform modeling that you have to be careful when cutting holes into the fuselage halves for wings and stabilizers. Study the particular kit you're building to make sure that the left and right halves agree with one another. I once built a Wyvern that was molded with the left wing opening 1/4" further aft than the right. If I hadn't done some measuring first I would have made a mess of it. Today's kits, and especially the products I've gotten from Koster, are very accurately molded but some of the old vacuforms weren't quite so precise. It makes building vacuform all the more satisfying when you are able to build a poorer quality kit into a presentable model, but it can also be exasperating to make cuts that don't line up. Measure twice, cut once!

Here's the stab cutout during trimming. Lots of filing and test fitting, but the process isn't anything difficult.
http://i174.photobucket.com/albums/w117/2AF/IMG_5765.jpg


After making both cutouts I slid the horizontal into the fuselage. Notice that it isn't 100% perpendicular to the vertical in this photo. A tiny bit of tweaking will make this come into line. I'll probably build a little fixture so that I get it just right.
http://i174.photobucket.com/albums/w117/2AF/IMG_5772.jpg


Just because I could, I assembled the sections together for the first time to get a feel for how the airplane will look someday. I haven't built a 1/48th B-17 for twenty years---darn it's big!!!!
http://i174.photobucket.com/albums/w117/2AF/IMG_5769.jpg


http://i174.photobucket.com/albums/w117/2AF/IMG_5771.jpg


Scott

4938
Combat Warplanes / Re: Cessna 172 - YU-BRI
« on: November 12, 2010, 04:36:51 PM »
I see this plane arouse  many beautiful memories. ;)  :-flo

It does for me as I maintained four of them at our little flight school. A simple, reliable, almost unbreakable airplane that also flys honestly. In fact it is actually TOO easy to fly in some ways!

Scott

4939
Aircraft Modeling / Re: Boeing Y1B-17 Project--1/48th Scale
« on: November 11, 2010, 08:34:48 PM »
Yes, I'll be adding some extra reinforcement to the horizontal stabilizer. Since I'll be removing the elevators I'll be able to add the spar in the same area as the close-out for the elevator well. On that F-89 I built years ago I made an aluminum carry-through spar in order to keep the wings from drooping in later years. It worked quite well in that application.

Planning a vacuform kit is really harder than building it. On this project I cut out and sanded all of the major pieces before starting to modify them. The fuselage halves need to have a lot of work done around the waist windows, for example. I'll temporarily assemble the two halves before I start cutting so as to keep everything stable and dimensionally accurate.

Scott

4940
Aircraft Modeling / Re: Boeing Y1B-17 Project--1/48th Scale
« on: November 11, 2010, 07:19:52 PM »
It's raining today so I did a little sanding. Here's a photo of the left fuselage half after removing most of the flash. You can see a little pigtail of material on the edge, a sign that you're just about at the correct sanding depth. From this point on you have to use a very light and even pressure on the part so as not to go too far:
http://i174.photobucket.com/albums/w117/2AF/IMG_5745.jpg


A couple of shots of test-fitting of the two halves after sanding. Notice that there is a tiny bit of a gap at the vertical fin/fuselage juncture--I still needed to touch up the top of the vertical fin to finish this part of the process. On larger parts it is sometimes difficult to uniformly sand all the surface at one time because vacuform pieces are usually a little bit more flexible than their styrene molded cousins.

http://i174.photobucket.com/albums/w117/2AF/IMG_5748.jpg

http://i174.photobucket.com/albums/w117/2AF/IMG_5747.jpg


The same process, this time on the horizontal stabilizer halves. I usually start by sanding the entire half as a unit, keeping it on the sandpaper with even pressure (providing that the part doesn't have dihedral, of course).

http://i174.photobucket.com/albums/w117/2AF/IMG_5749.jpg


After getting through the flash it's time to fine tune the process. For this part I sand only the left and right halves of each piece individually so as to get a uniform leading and trailing edge thickness.

http://i174.photobucket.com/albums/w117/2AF/IMG_5753.jpg

http://i174.photobucket.com/albums/w117/2AF/IMG_5750.jpg


And here are the two halves after sanding and finessing.

http://i174.photobucket.com/albums/w117/2AF/IMG_5755.jpg

http://i174.photobucket.com/albums/w117/2AF/IMG_5754.jpg


You can see from the last photo that the trailing edge is still a bit thick. With careful sanding you can achieve a knife-edge on most vacuform surfaces, especially on a Koster kit. In this case I'm going to be cutting the elevators and trim tabs loose from the stabilizer later and I'll finish the thinning of the trailing edges then.

More later,
Scott

4941
Combat Warplanes / Re: Cessna 172 - YU-BRI
« on: November 11, 2010, 05:11:20 PM »
YU-BRI is identical to an airplane I used to maintain and fly at a flight school I was employed at. Right down to the paint scheme--the only thing missing is that ours had wheel pants. Brings back good memories of a simpler time for me!

Scott

4942
Aircraft Modeling / Re: Boeing Y1B-17 Project--1/48th Scale
« on: November 06, 2010, 06:14:24 AM »
Excellent tip, Nico! That's the kind of information I hope comes out in the vacuform discussion.

I still remember the very first vacuform kit I purchased and how near-impossible it looked to me. After working with the stuff, and learning from others, I got to a place where I didn't mind building with vacuformed parts. I must confess that I never did finish the old 1/72 XB-35 Flying Wing, though--the styrene kit came out before I ever got up enough intestinal fortitude to build my vacformed one! :-cool

Scott

4943
Aircraft Modeling / Re: Boeing Y1B-17 Project--1/48th Scale
« on: November 05, 2010, 07:43:12 PM »
Thank you for the interest. Perhaps I'll take better and more photos and others can add their techniques if y'all would like.

Have a good weekend,
Scott

4944
Aircraft Modeling / Re: Boeing Y1B-17 Project--1/48th Scale
« on: November 05, 2010, 06:35:40 PM »
I know that most of the contributors on this forum are familiar with vacuum-formed modeling, but I thought I'd do a little how-to for those who haven't yet attempted a vacuform modification or kit. I apologize to everyone who's already familiar with this media, but I will share my techniques for those who aren't.

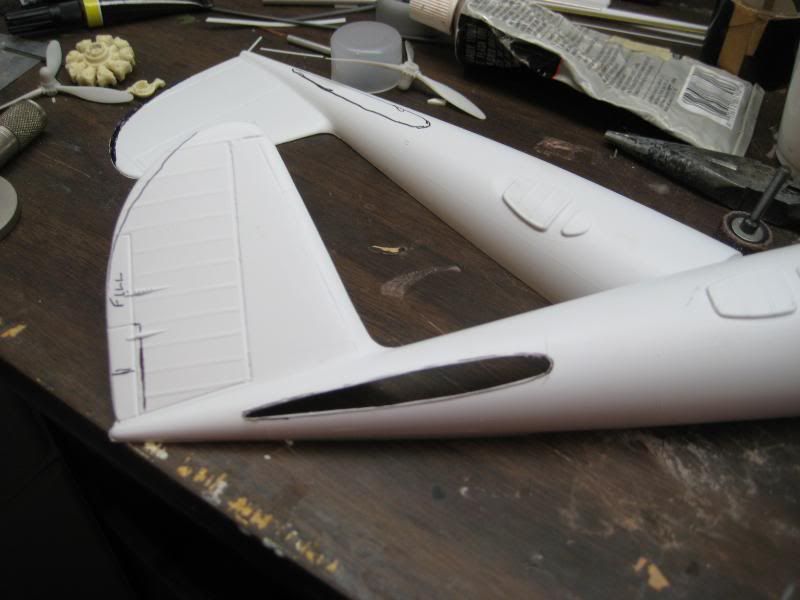
My first step is to plan where and what to cut out first. That can actually be important with some vacuform kits as damage to outlying parts can occur if you're too aggressive with the big pieces. Here's a Koster PB4Y modification kit for an example:
http://i174.photobucket.com/albums/w117/2AF/IMG_5728.jpg


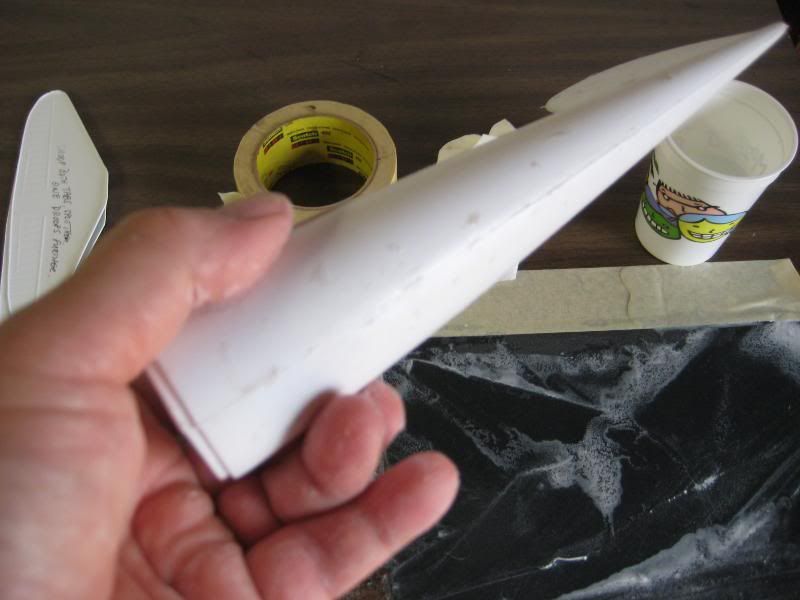
On a sheet this size I usually cut the major parts into individual segments before the close trimming begins.

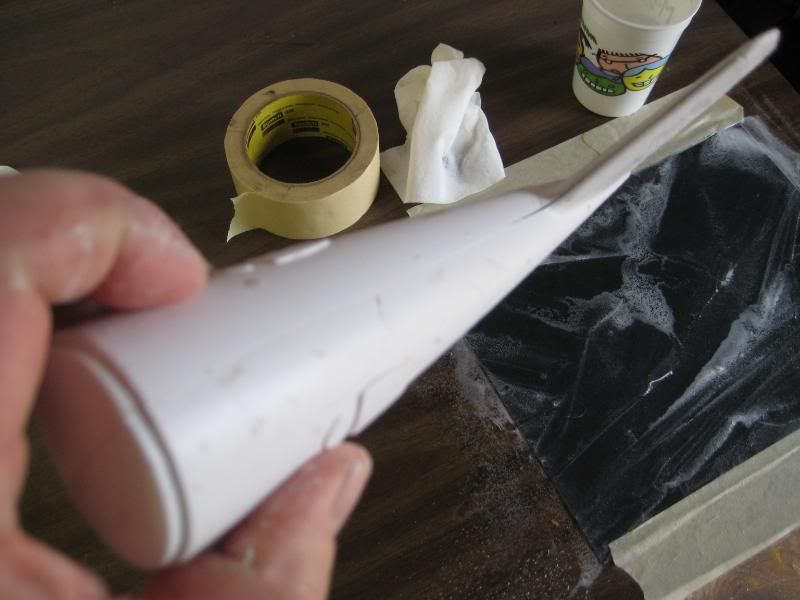
Next, get out a SHARP X-Acto blade and scribe fully around the part, leaving just a little bit of the flat sheet with the part:
http://i174.photobucket.com/albums/w117/2AF/IMG_5726.jpg

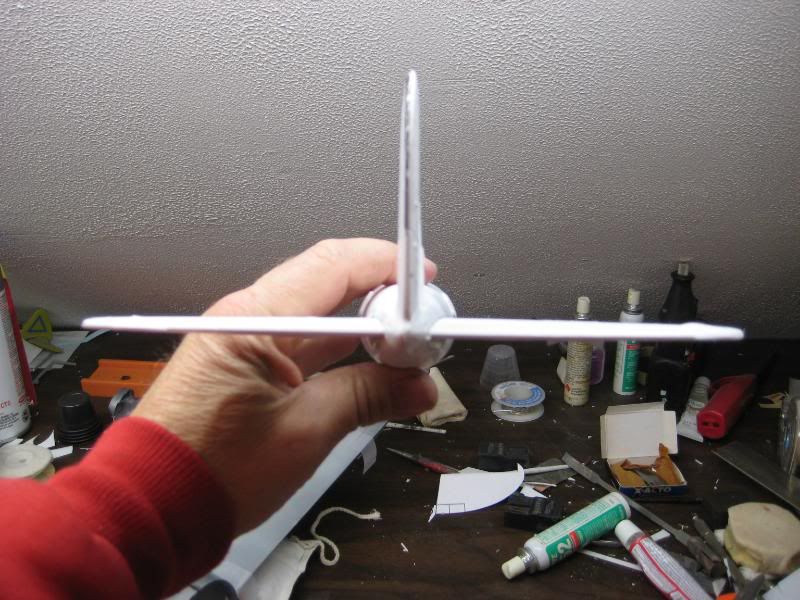
When you've completed scribing the outline, very carefully snap the extra plastic off and free the part from the sheet.

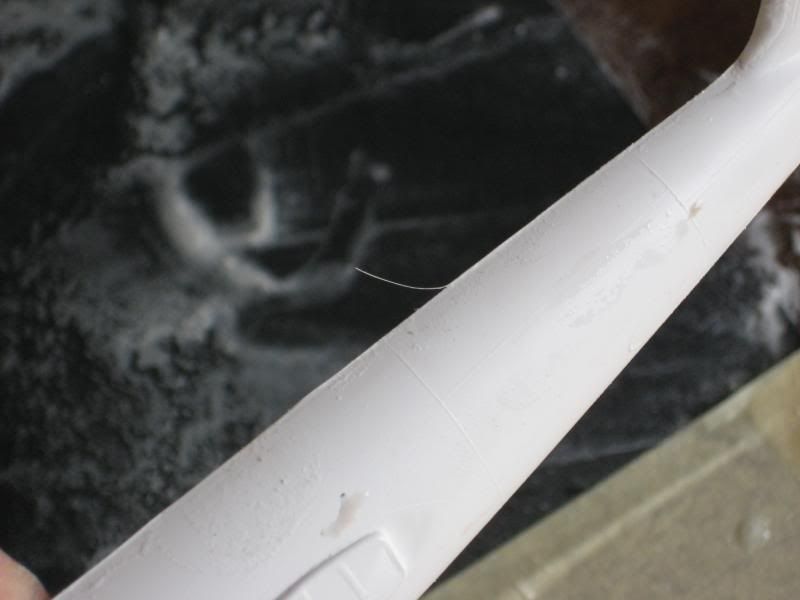
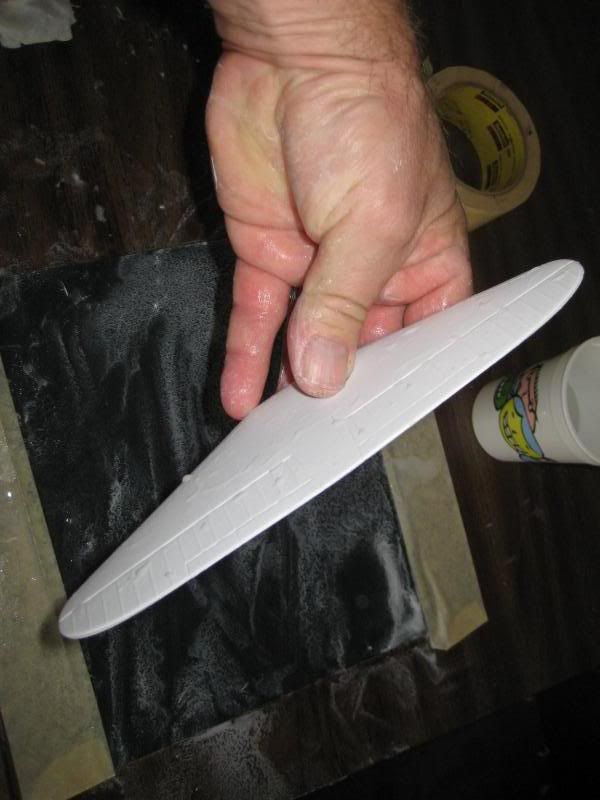
Here's half of the horizontal stabilizer for the YB after being snapped out of the sheet.
http://i174.photobucket.com/albums/w117/2AF/IMG_5729.jpg


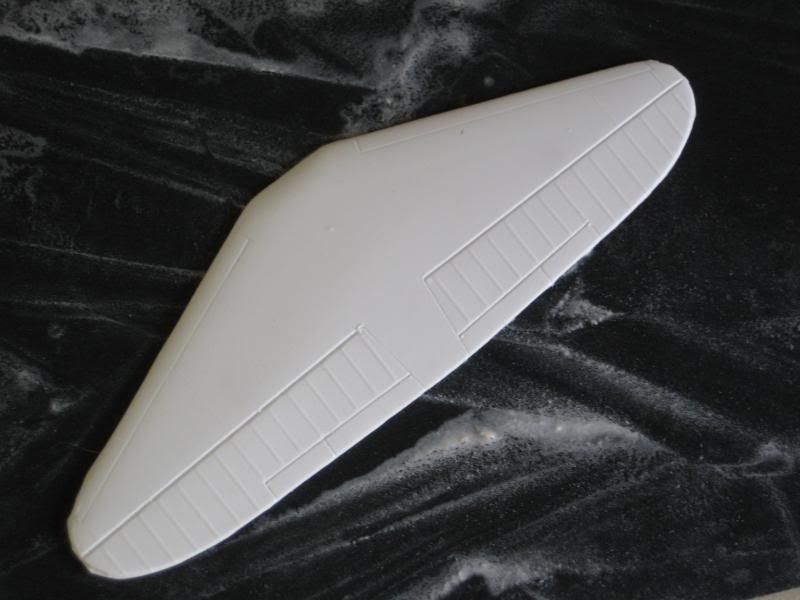
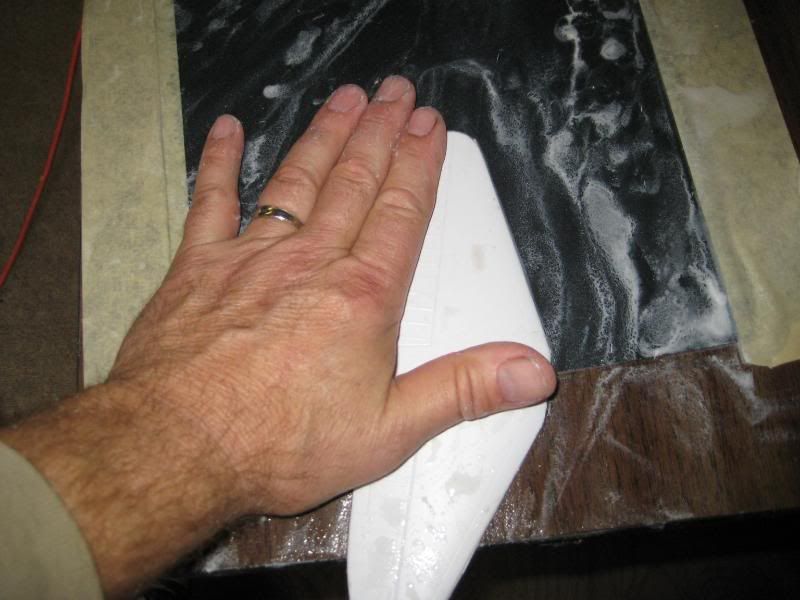
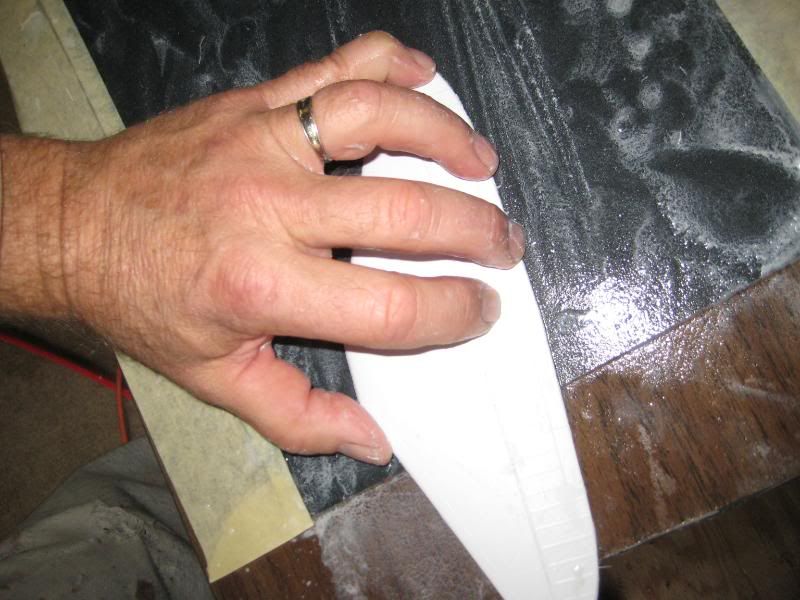
Now, prepare a flat, hard, stable surface--a desktop works well--and secure some rough sandpaper (I use 180 or 240 grit for this) to the tabletop. Then, carefully sand the excess material from the part you're working with by using slow, deliberate strokes, keeping steady pressure on the entire part so as not to over or under sand the seam. This is the critical step in preparing vacuform parts as it's easy to sand off too much material. I also wet-sand as it keeps the sanded material from collecting on the paper.

http://i174.photobucket.com/albums/w117/2AF/IMG_5731.jpg

http://i174.photobucket.com/albums/w117/2AF/IMG_5732.jpg


I'll add to this process when I get more time to do so,
Scott
 

4945
Aircraft Modeling / Re: Boeing Y1B-17 Project--1/48th Scale
« on: November 03, 2010, 07:01:53 PM »
Well, after a long hibernation, I rebuilt the damage I caused in the right wheelwell last weekend. It actually wasn't too much of a bother and served to get me back into the habit of working on the model again. My next project is going to be the aft fuselage section and empennage. I'll have much more time at home on weekends now so I should make progress.

Scott

4946
Warplane Art / Re: Boeing YB17
« on: October 16, 2010, 07:00:57 PM »
I
Thank you friends for your kind reply :-ok Scott- just take your time, your build is so good and it is worth some time to wait :-clap

I've been waiting eight months, though! :-wall

S

4947
Warplane Art / Re: Boeing YB17
« on: October 16, 2010, 03:24:01 PM »
Very nice, and appropriate that you posted the update now, No.1. I am hoping to resume work on the project in the near future as model-building weather is just around the corner. We're finishing up some much needed painting and maintenance of our home and shop and after I finish with that project I intend to start again on the '17. Perhaps this fall and winter I can actually start assembling the little bits into larger bits!

Scott

4948
Aircraft Modeling / Re: Tidal Wave Anniversary
« on: August 16, 2010, 05:55:16 PM »
Scott- any plans to build model with two blue colors on insignia?

I have a set of decals for a B-24 with the darker borders somewhere but no plans to start it as yet. I actually have two Liberators started, one is Harper's Ferry of the 449th Bomb Group and the other is the very early LB-30/B-24A AM927 that will end up in her original RAF configuration and paint scheme.

4949
Combat Warplanes / Re: Unknown Junkers project
« on: August 13, 2010, 04:13:29 PM »
It almost seems that the designers were building on the idea of the Savoia Marchetti S-55.

Scott

4950
Warplane Art / Re: OS2U Kingfisher
« on: August 09, 2010, 06:01:49 PM »
I think a much larger engine would balance the airplane.  ;) Being a Vought product it has similar lines to the Corsair. If it had an R-2800 things would look just about right!!! :-jump

I love the Mexican markings and camouflage. I may have to build the kit I have in storage now that you've inspired me....

Scott


Pages: 1 ... 328 329 [330] 331 332 ... 336