Show Posts

This section allows you to view all posts made by this member. Note that you can only see posts made in areas you currently have access to.


Messages - Second Air Force

Pages: 1 ... 297 298 [299] 300 301 ... 336
4471
Aircraft Modeling / Re: HOW TO: Natural Metal Finishes
« on: May 29, 2011, 06:16:46 AM »
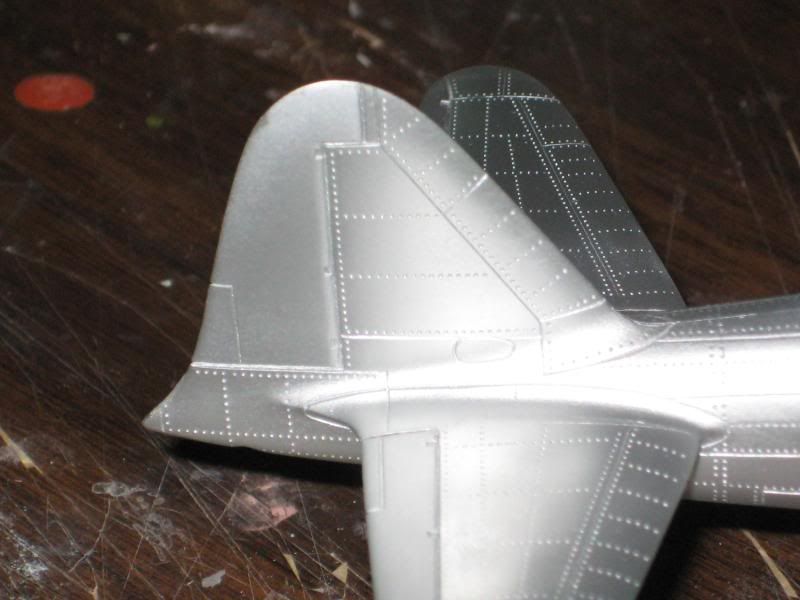
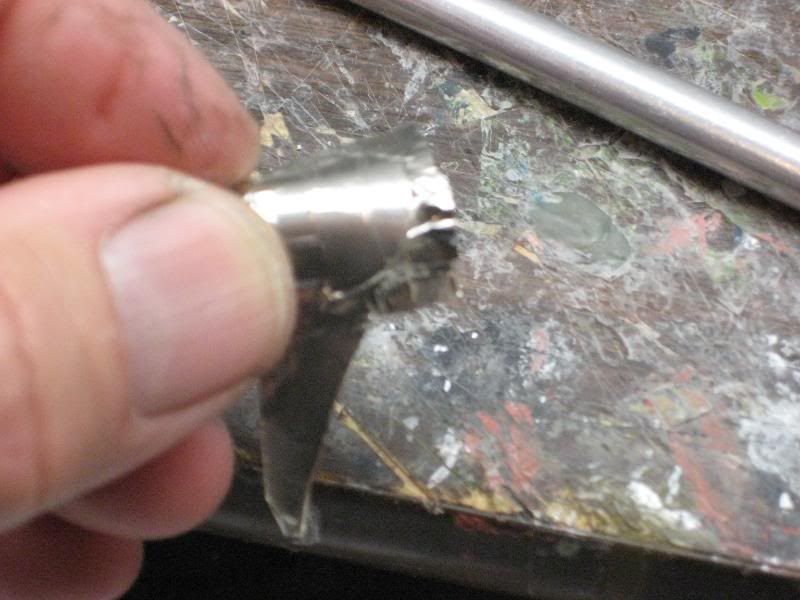
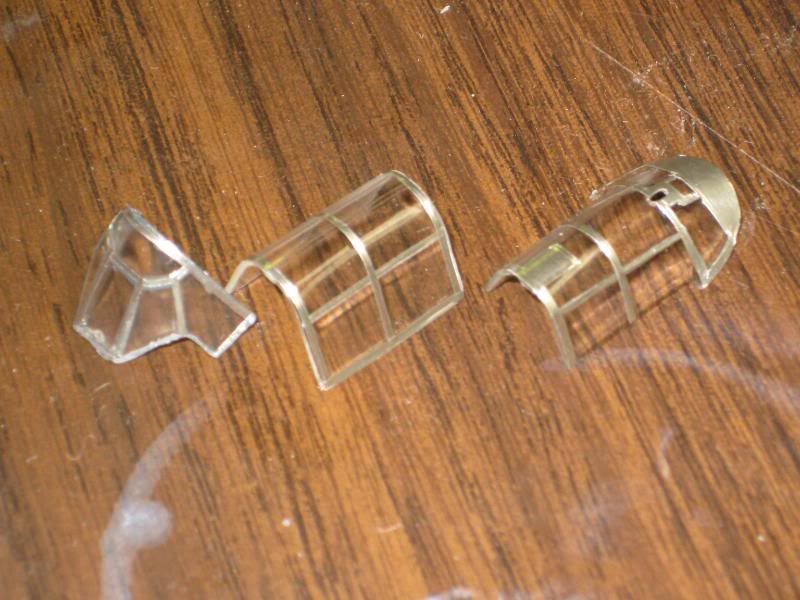
The canopy of the NMF Zero is a good example of using unpainted foil for the framing. First photo shows (sorry about the photo quality) a large piece of foil laid onto the compound curvature of the rear canopy section. Once the foil is burnished down the molded in frame lines are easy to use as a guide for cutting out the clear portions with a new X-acto blade.
http://i174.photobucket.com/albums/w117/2AF/IMG_7224.jpg


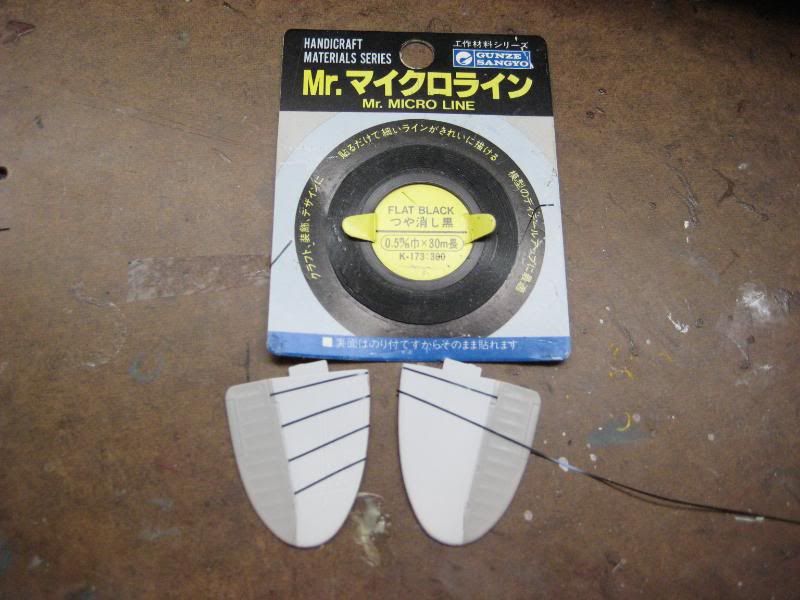
The balance of the framing was done with separate strips as shown on the P-47 project a page or two ago.
http://i174.photobucket.com/albums/w117/2AF/IMG_7225.jpg

4472
Aircraft Modeling / Re: Group Build> Japan
« on: May 28, 2011, 09:45:03 PM »
The EggZero is looking great!

4473
Aircraft Modeling / Re: Group Build> Japan
« on: May 28, 2011, 06:35:43 PM »
I'm far from a master at this but I'm learning every time I try it. Here's the repaired rudder with a BareMetal foil trim tab added:
http://i174.photobucket.com/albums/w117/2AF/IMG_7210.jpg

Also some additional shading of other sections. I described the shading in the NMF sticky thread for the curious.
http://i174.photobucket.com/albums/w117/2AF/IMG_7215.jpg

4474
Aircraft Modeling / Re: HOW TO: Natural Metal Finishes
« on: May 28, 2011, 06:33:02 PM »
I managed to repair the damaged rudder coating over morning coffee today. First I "de-de-stickied" :-roll some more tape and affixed it to paper towel segments for masking.
http://i174.photobucket.com/albums/w117/2AF/IMG_7208.jpg

Then it was a simple matter to lightly sand the rudder with 8000 grit Micromesh sanding cloth and respray with the Metalizer and a coat of sealer. The bright trim tab is Chrome BareMetal foil.
http://i174.photobucket.com/albums/w117/2AF/IMG_7210.jpg


As a further example of the different shades and textures that you can accomplish with just one bottle of Metalizer, here is the outer wing panel of the A6M5. The leading edge is MM Buffing Aluminum (not polished), the center portion is the same shade but polished with a soft cloth embedded with aluminum powder, and the aileron is, again, the same shade, this time not polished and given a coat of MM Metalizer Sealer.
http://i174.photobucket.com/albums/w117/2AF/IMG_7214.jpg


This shading is quite subtle, and hard to see from some angles, but worth the extra masking, I think.

4475
Aircraft Modeling / Re: HOW TO: Natural Metal Finishes
« on: May 27, 2011, 08:36:54 PM »
I think I need to try that Tamiya tape sooner than I thought!

4476
Aircraft Modeling / Re: HOW TO: Natural Metal Finishes
« on: May 27, 2011, 08:14:56 PM »
How about a posting of mistakes made? I'm working on a natural metal Zero on the Japan Group Build as frequent LLL members know. A few days ago I sprayed the flight control surfaces with Model Master buffing aluminum and then sealed them with the NMF sealer also from MM. This morning I masked all the flight controls with low-tack tape prior to spraying the next coat on the airframe. I used this Scotch brand tape and took the precaution of making it even less sticky by rubbing my fingers over the adhesive repeatedly.
http://i174.photobucket.com/albums/w117/2AF/IMG_7205.jpg


I tested the tape on an area and it seemed to be fine. When I was removing the masking I found that the sealer stripped off of the left side of the rudder.......
http://i174.photobucket.com/albums/w117/2AF/IMG_7198.jpg

The right and all other surfaces turned out fine.
http://i174.photobucket.com/albums/w117/2AF/IMG_7200.jpg


Apparently I didn't "de-sticky" the tape quite enough on the rudder half. In the next installment I'll show how simple it can be to repair such damage if it should occur.

4477
Aircraft Modeling / Re: Group Build> Japan
« on: May 27, 2011, 08:00:35 PM »
Another nice morning for coffee and airbrushes...... :)

The second step of the NMF for the Zero was applied after masking the flight controls. I created a small setback :-wall during the masking/unmasking in that a bit of the sealer came off with the masking on the left side of the rudder. I will do an addition to the NMF sticky to show this mistake and how to repair it.

While painting I mixed up my "propeller brown" and sprayed both props and spinners in the appropriate colors. The brown prop with grey spinner is for the Val, the other for the Zero. The fuel tank will find itself under the belly of the Val one day.
http://i174.photobucket.com/albums/w117/2AF/IMG_7196.jpg

4478
Combat Warplanes / Re: Curtiss-Wright CW-21
« on: May 27, 2011, 04:23:34 PM »
I don't have the exact figures at hand, but the F2A-2 and Buffalo Mk.1 had a gross weight of around 6500 pounds with 1100 horsepower. The Dutch machines were almost 1000 pounds :-eek lighter and the last couple dozen ships had 1200 h.p. Compared to the American and British airplanes I'd bet the ML-KNIL 339s and 439s felt like rocketships!

I tip my hat to the Finns and Dutch for getting the most out of the Brewster design!

4479
Aircraft Modeling / Re: Group Build> Japan
« on: May 26, 2011, 08:16:29 PM »
Thanks, Sall. No.1, the Kawanishi looks like a great project!

The belly of the D3A got its grey paint this morning after I updated the outboard bomb racks with the help of Srecko's photo. I'd hoped to spray some of the NMF on the Zero but ran out of time.
http://i174.photobucket.com/albums/w117/2AF/IMG_7193.jpg

4480
Aircraft Modeling / Re: F-106 Delta Dart
« on: May 26, 2011, 08:13:20 PM »
The Dart is up on its gear with the external tanks and speedbrakes installed. About all that remains is to install the radome, canopy, and a few small details. I've run out of space on the workbench so I took this picture in the "satellite" room! :-blah
http://i174.photobucket.com/albums/w117/2AF/IMG_7194.jpg

4481
Aircraft Modeling / Re: Group Build> Japan
« on: May 26, 2011, 07:38:02 AM »
It's never too late for more reference photos! In fact, I'll be revamping my bomb racks using this picture as a guide.

Notice the very thin white outline on the hinomaru--usually the underwing markings seemed to be only the red disc.

4482
Aircraft Modeling / Re: Group Build> Japan
« on: May 25, 2011, 08:21:59 PM »
Headaches are never any fun :-wall--hope you're feeling better!

The Val now has the landing gear, modified oil cooler scoop, and bomb crutch installed. Then I pulled out my 25-year-old :-wise Gunze pinstriping roll (worked perfectly) and masked off the stripes on each horizontal stabilizer.
http://i174.photobucket.com/albums/w117/2AF/IMG_7190.jpg

http://i174.photobucket.com/albums/w117/2AF/IMG_7191.jpg

http://i174.photobucket.com/albums/w117/2AF/IMG_7192.jpg


Once the canopy is figured out this one will be ready for final painting. The radio/gun cockpit aft canopy sections of the -2 are quite different than the -1 so there will be some scratchbuilding and vacuforming to be done in that area.

4483
Aircraft Modeling / Re: Group Build> Japan
« on: May 25, 2011, 04:33:18 PM »
 :-love :-ok :-clap

4484
Aircraft Modeling / Re: Group Build> Japan
« on: May 24, 2011, 08:20:40 PM »
The splinter camouflage makes it even more aggressive looking!

4485
Aircraft Modeling / Re: Fokker D.VII Group build
« on: May 24, 2011, 03:55:31 PM »
Excellent work, y'all!

Pages: 1 ... 297 298 [299] 300 301 ... 336