Author Topic: Me 262 V-3  (Read 39490 times)

Offline No.1

  • Administrator and Owner
  • Administrator
  • Hero Member
  • *****
  • Posts: 23150
  • Owner: www.letletlet-warplanes.com
    • View Profile
    • LetLetLet - Warplanes
Re: Me 262 V-3
« Reply #45 on: December 22, 2012, 11:49:26 PM »
Great work mate :) So, next step is fuselage parts assembly :))

Offline Second Air Force

  • Moderator
  • Hero Member
  • *****
  • Posts: 5777
    • View Profile
Re: Me 262 V-3
« Reply #46 on: December 23, 2012, 02:13:46 AM »
Great work mate :) So, next step is fuselage parts assembly :))

Well, not yet exactly. First I'm going to tape the fuselage halves together and figure out the windscreen and aft canopy enclosure. I have some ideas :-think :-think about this and will most likely vacuform the clear parts. After getting complete satisfaction with fit of the canopy bits I'll add the cockpit--it will be cleaner that way.

Offline Second Air Force

  • Moderator
  • Hero Member
  • *****
  • Posts: 5777
    • View Profile
Re: Me 262 V-3
« Reply #47 on: December 23, 2012, 06:24:08 AM »
The transparencies are starting to come into focus, so to speak. The first few Me 262s had older-style enclosures with wrap around one-piece windscreens. The opening portion is a multi pane design. The only part of the kit glass that can be used is the aft fixed segment, and this also must be modified.

To start this I spent several hours in my clear spares box and various kits that I thought might give me some inspiration. I finally settled on an Otaki F4U Corsair windscreen. This is a bit too tall but the slope of the windscreen and general shape are just what is needed. The first step in this conversion was to cut off the kit windscreen from the segment of fuselage decking it is molded to. While I first thought this would make the conversion harder, I now realize that Tamiya did me a favor by making this fuselage/windscreen in one piece. The Corsair windshield was then trimmed to the general shape needed and then was tacked to the clear turtledeck section. The gap is a result of the kit windscreen being longer than the wraparound style and this will be filled with styrene to give the proper fit. As this process continues I may have to sacrifice a second Otaki windshield to provide a perfect fit, but this one may turn out as needed:
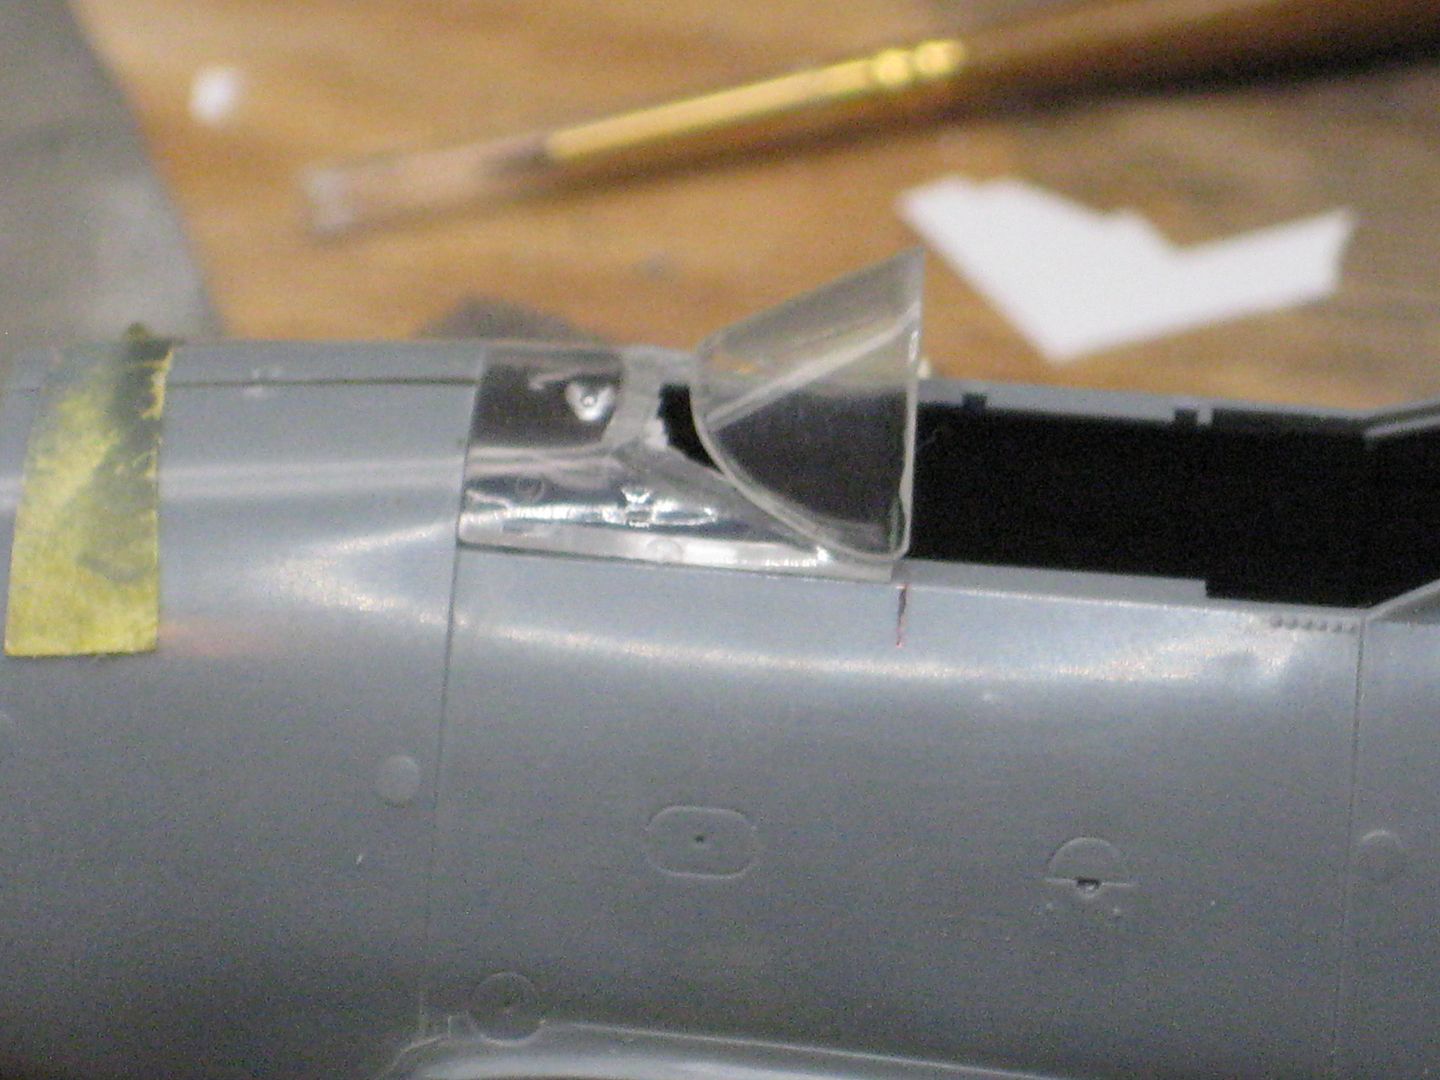
http://i174.photobucket.com/albums/w117/2AF/IMG_1173_zpsc1a6e0f1.jpg
Me 262 V-3


Next was to trim the rear segment so that the forward frame is vertical. The standard 262 part is sloped aft quite a lot. Then more digging in the spares bin for the opening segment. This has much work to be done to it yet, but things are falling into place enough to do a fit-check and profile check:
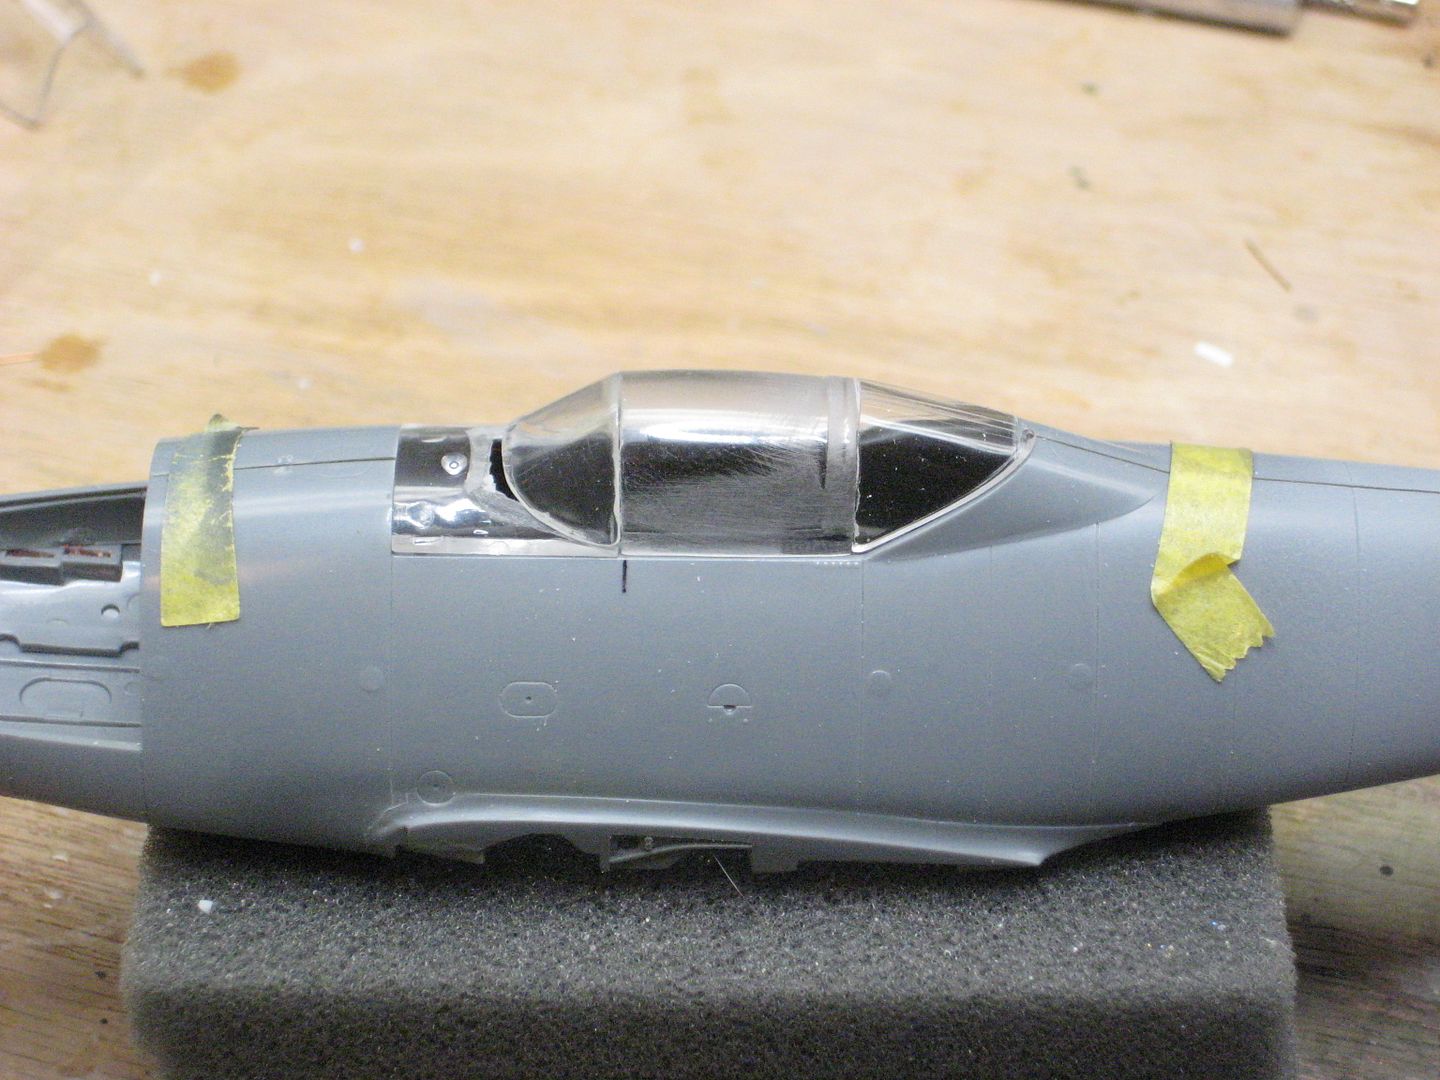
http://i174.photobucket.com/albums/w117/2AF/IMG_1174_zps068af173.jpg
Me 262 V-3


Lots of work yet to do, but at least there is now the general shape needed.

Offline No.1

  • Administrator and Owner
  • Administrator
  • Hero Member
  • *****
  • Posts: 23150
  • Owner: www.letletlet-warplanes.com
    • View Profile
    • LetLetLet - Warplanes
Re: Me 262 V-3
« Reply #48 on: December 23, 2012, 06:32:32 AM »
All right, it come to shape ;)

Offline Sall

  • Sr. Member
  • ****
  • Posts: 4641
  • Build what YOU want,the way YOU want to,and above all-have fun!
    • View Profile
Re: Me 262 V-3
« Reply #49 on: December 23, 2012, 11:21:10 AM »
 :-clap :-ok

Offline Second Air Force

  • Moderator
  • Hero Member
  • *****
  • Posts: 5777
    • View Profile
Re: Me 262 V-3
« Reply #50 on: December 25, 2012, 05:04:17 AM »
A second Corsair windshield assembly was modified a bit and fits nicely on the Tamiya fuselage decking. You'll notice a bit of extra material is visible under the windscreen portion. This has been trimmed back to be flush with the windshield framing prior to gluing. Here are all three transparencies sanded smooth and polished, then test-fitted to the fuselage with a photo of V-2 as a guide:
http://i174.photobucket.com/albums/w117/2AF/IMG_1179_zps9eee64ba.jpg
Me 262 V-3


Now that the plexiglas is satisfactorily fabricated the fuselage has been glued together and the rest of the model will go together without too many more modifications:
http://i174.photobucket.com/albums/w117/2AF/IMG_1184_zpsfdb9e6aa.jpg
Me 262 V-3


Then engine nacelles come together under the wings and a little filler is applied to the seams. This is also a good time to mask the windscreen and apply a tiny bit of filler on the fuselage panel/windscreen joint:
http://i174.photobucket.com/albums/w117/2AF/IMG_1185_zpsed5d95b0.jpg
Me 262 V-3

Offline No.1

  • Administrator and Owner
  • Administrator
  • Hero Member
  • *****
  • Posts: 23150
  • Owner: www.letletlet-warplanes.com
    • View Profile
    • LetLetLet - Warplanes
Re: Me 262 V-3
« Reply #51 on: December 25, 2012, 07:10:28 AM »
Good way mate :-clap

Offline Sall

  • Sr. Member
  • ****
  • Posts: 4641
  • Build what YOU want,the way YOU want to,and above all-have fun!
    • View Profile
Re: Me 262 V-3
« Reply #52 on: December 25, 2012, 09:23:10 AM »
 :-clap :-clap :-clap

Offline Second Air Force

  • Moderator
  • Hero Member
  • *****
  • Posts: 5777
    • View Profile
Re: Me 262 V-3
« Reply #53 on: December 26, 2012, 06:50:34 AM »
After our Christmas meal and a walk with the dog I spent a good deal of the afternoon working on the V-3. Some priming to find flaws, filler, primer etc..... The windscreen assembly is finally satisfactory and ready for installation. The test-fitting is only temporary. This will be the last thing added to the final assembly after all other priming is complete. (You can see why I added the wiring and plumbing forward of the instrument panel in the second photo--quite a lot is visible with the windscreen installed!)
http://i174.photobucket.com/albums/w117/2AF/IMG_1187_zpsdd509000.jpg
Me 262 V-3

http://i174.photobucket.com/albums/w117/2AF/IMG_1188_zpsb732f212.jpg
Me 262 V-3


I could see no excuse not to continue, so the wing and horizontal stabilizers were mounted and filling began. All the pre-planning and endless test-fitting really paid of quite nicely as a minimal amount of filler is needed at the modified joints:
http://i174.photobucket.com/albums/w117/2AF/IMG_1191_zps76265278.jpg
Me 262 V-3

http://i174.photobucket.com/albums/w117/2AF/IMG_1190_zps5fb7c9dd.jpg
Me 262 V-3


Perhaps even some primer can be applied tomorrow if time permits!

Offline No.1

  • Administrator and Owner
  • Administrator
  • Hero Member
  • *****
  • Posts: 23150
  • Owner: www.letletlet-warplanes.com
    • View Profile
    • LetLetLet - Warplanes
Re: Me 262 V-3
« Reply #54 on: December 26, 2012, 07:38:11 AM »
Very good done mate :-ok

Offline Sall

  • Sr. Member
  • ****
  • Posts: 4641
  • Build what YOU want,the way YOU want to,and above all-have fun!
    • View Profile
Re: Me 262 V-3
« Reply #55 on: December 26, 2012, 09:32:55 PM »
Great work my friend!! :-clap

Offline Second Air Force

  • Moderator
  • Hero Member
  • *****
  • Posts: 5777
    • View Profile
Re: Me 262 V-3
« Reply #56 on: December 28, 2012, 06:17:34 AM »
Okay, all priming and filling is now done and the jet is nearly ready for final camouflage coats. I've been working on assembling the elements for the landing gear tonight. The plan is to make final assembly of the gear and test-fit these prior to starting the painting:
http://i174.photobucket.com/albums/w117/2AF/IMG_1194_zpsc96241b9.jpg
Me 262 V-3


I took time off from the 262 to do a bit of painting on the Yak (other thread) and this Fw 190D. As you see by the second photo, this Fw was assigned to the airfield protection unit of JV 44, so it's Me 262-related!
http://i174.photobucket.com/albums/w117/2AF/IMG_1196_zps94ade655.jpg
Me 262 V-3

http://i174.photobucket.com/albums/w117/2AF/IMG_1197_zpsaf4cdbc7.jpg
Me 262 V-3


Offline No.1

  • Administrator and Owner
  • Administrator
  • Hero Member
  • *****
  • Posts: 23150
  • Owner: www.letletlet-warplanes.com
    • View Profile
    • LetLetLet - Warplanes
Re: Me 262 V-3
« Reply #57 on: December 28, 2012, 06:25:56 AM »
Fw 190 D look great :-ok

Offline Sall

  • Sr. Member
  • ****
  • Posts: 4641
  • Build what YOU want,the way YOU want to,and above all-have fun!
    • View Profile
Re: Me 262 V-3
« Reply #58 on: December 28, 2012, 11:13:48 AM »
Great work mate!!! :-clap :-clap

Offline Second Air Force

  • Moderator
  • Hero Member
  • *****
  • Posts: 5777
    • View Profile
Re: Me 262 V-3
« Reply #59 on: January 02, 2013, 04:42:09 AM »
The main landing gear assemblies are now coming together. Still a bit of adjustment and a couple of small bits to be manufactured yet. Then brake lines and landing gear doors can be mounted:
http://i174.photobucket.com/albums/w117/2AF/IMG_1257_zpsc0467157.jpg
Me 262 V-3


Then a test fitting to the airframe. This, again needs adjustment but progress is being made. I was able to check the strut length against my drawings and photos of the real thing:
http://i174.photobucket.com/albums/w117/2AF/IMG_1258_zps1992d0cf.jpg
Me 262 V-3